
how to paint kitchen backsplash
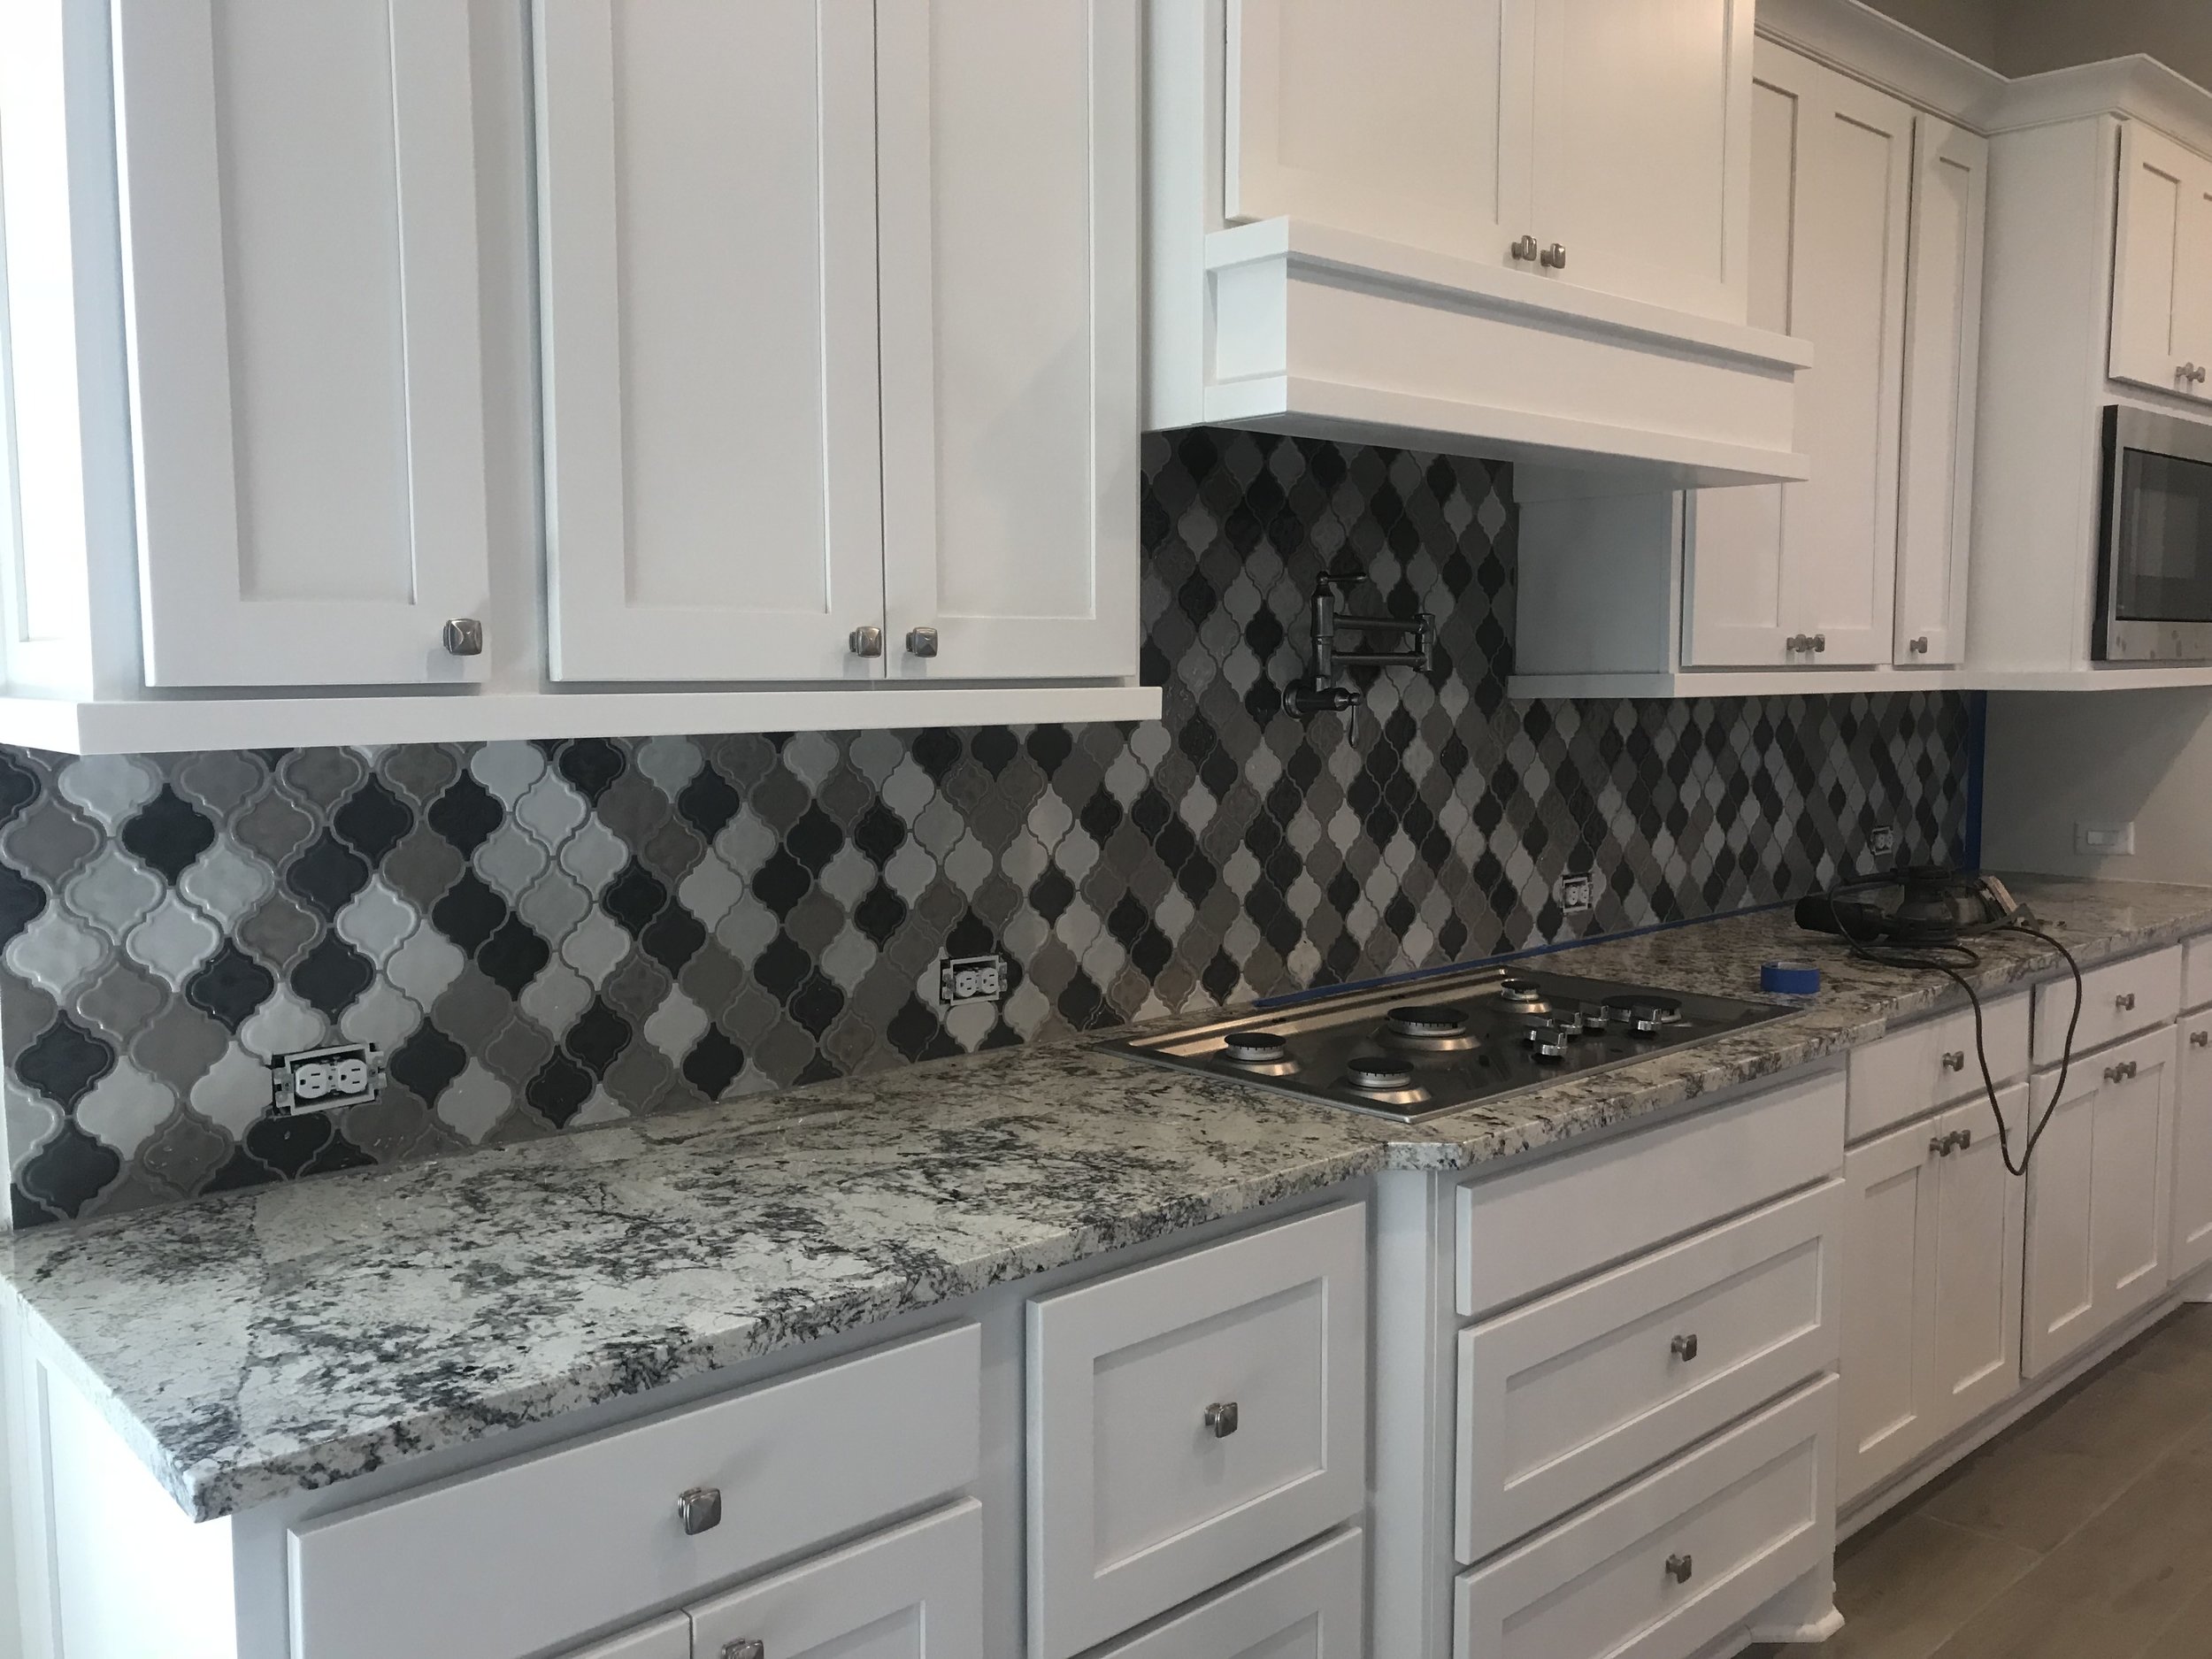
When we bought our home back in July, we fell in love with pretty much all of the house except for the kitchen backsplash. As soon as we walked into the kitchen, the dark patterned tile glared at us as if to say “Change me!”. It’s not that I don’t like patterned tile/backsplash, but with our particular granite style it just felt really busy in the space. It also made the kitchen appear much darker/smaller than it would with a lighter tile. Our home was in the very final stages of construction and the builder wouldn’t change the backsplash at that point. We decided to take matters into our own hands and two months after moving in, finally tackled the project. We considered all options, with the first of course being to simply replace the tile. But this proved to be pretty pricey, since they’d have to not only replace the tile but also the drywall behind it.
We went to Sherwin Williams (this post is not sponsored by the way!) where we were given some direction as far as what primer and paint to use and how to go about the process. I’ll share all of it below! Here is our before and after:

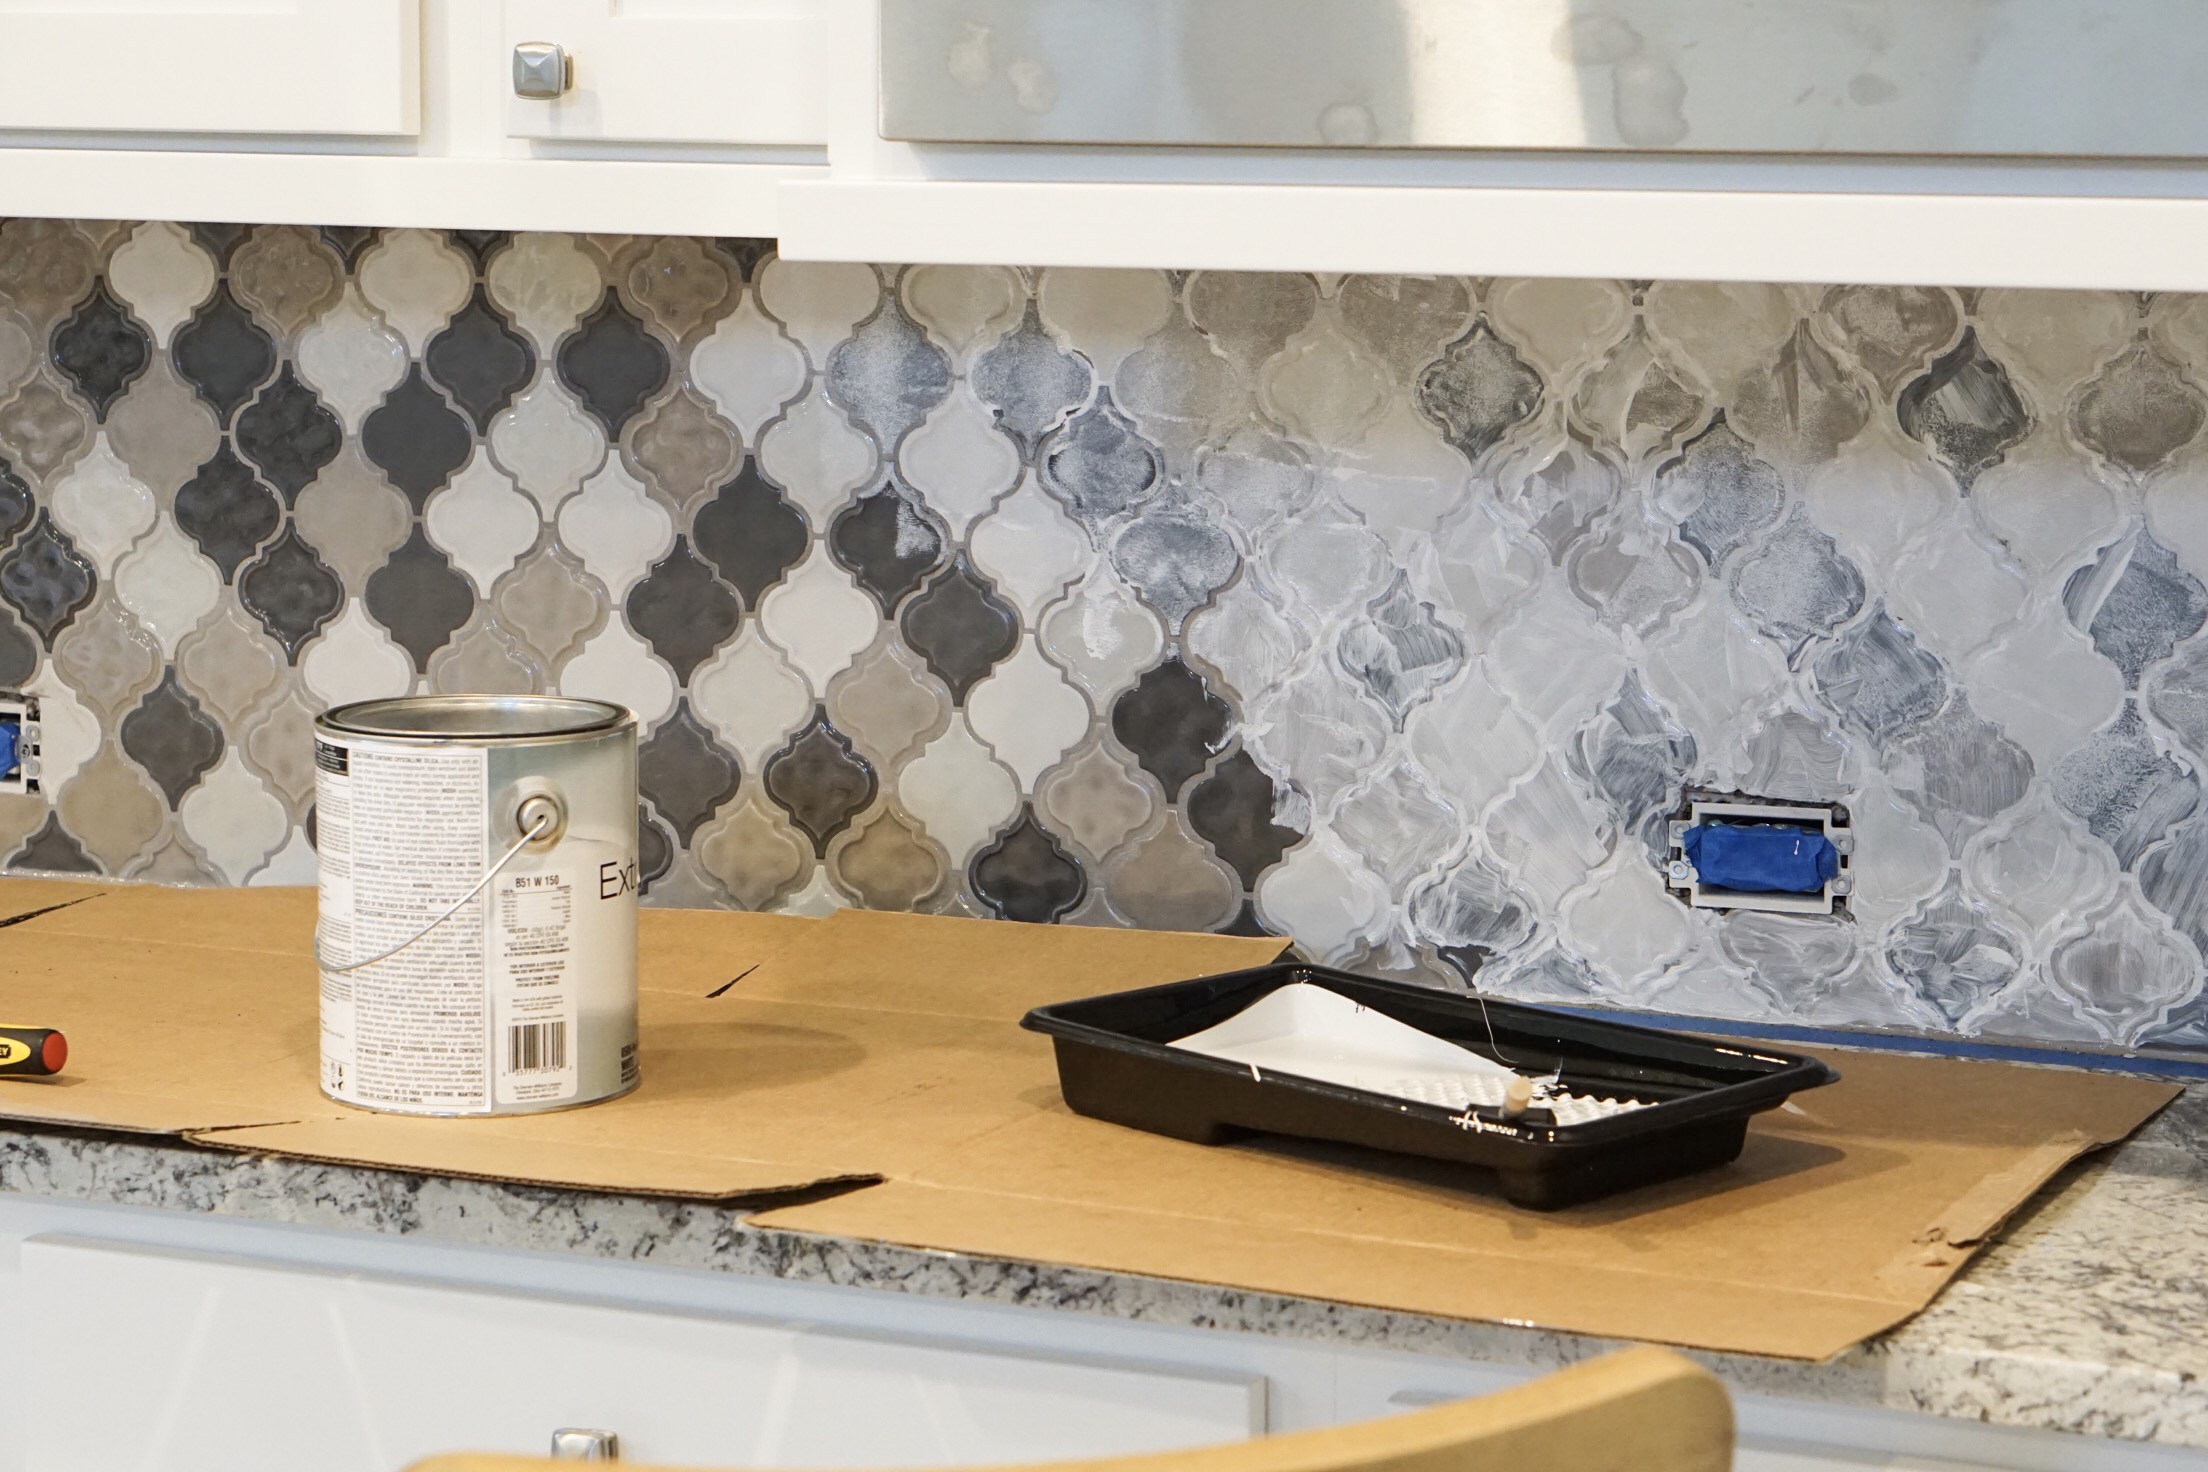
Zach was a big help with this project- thank you, Z! He started by taping everything off, removing light switch plates, and doing some heavy-duty sanding. Since our tile is glass and was very slick/shiny, we needed to do a lot of sanding. The electric sander ending up crashing on us so Zach sanded most of it by hand.
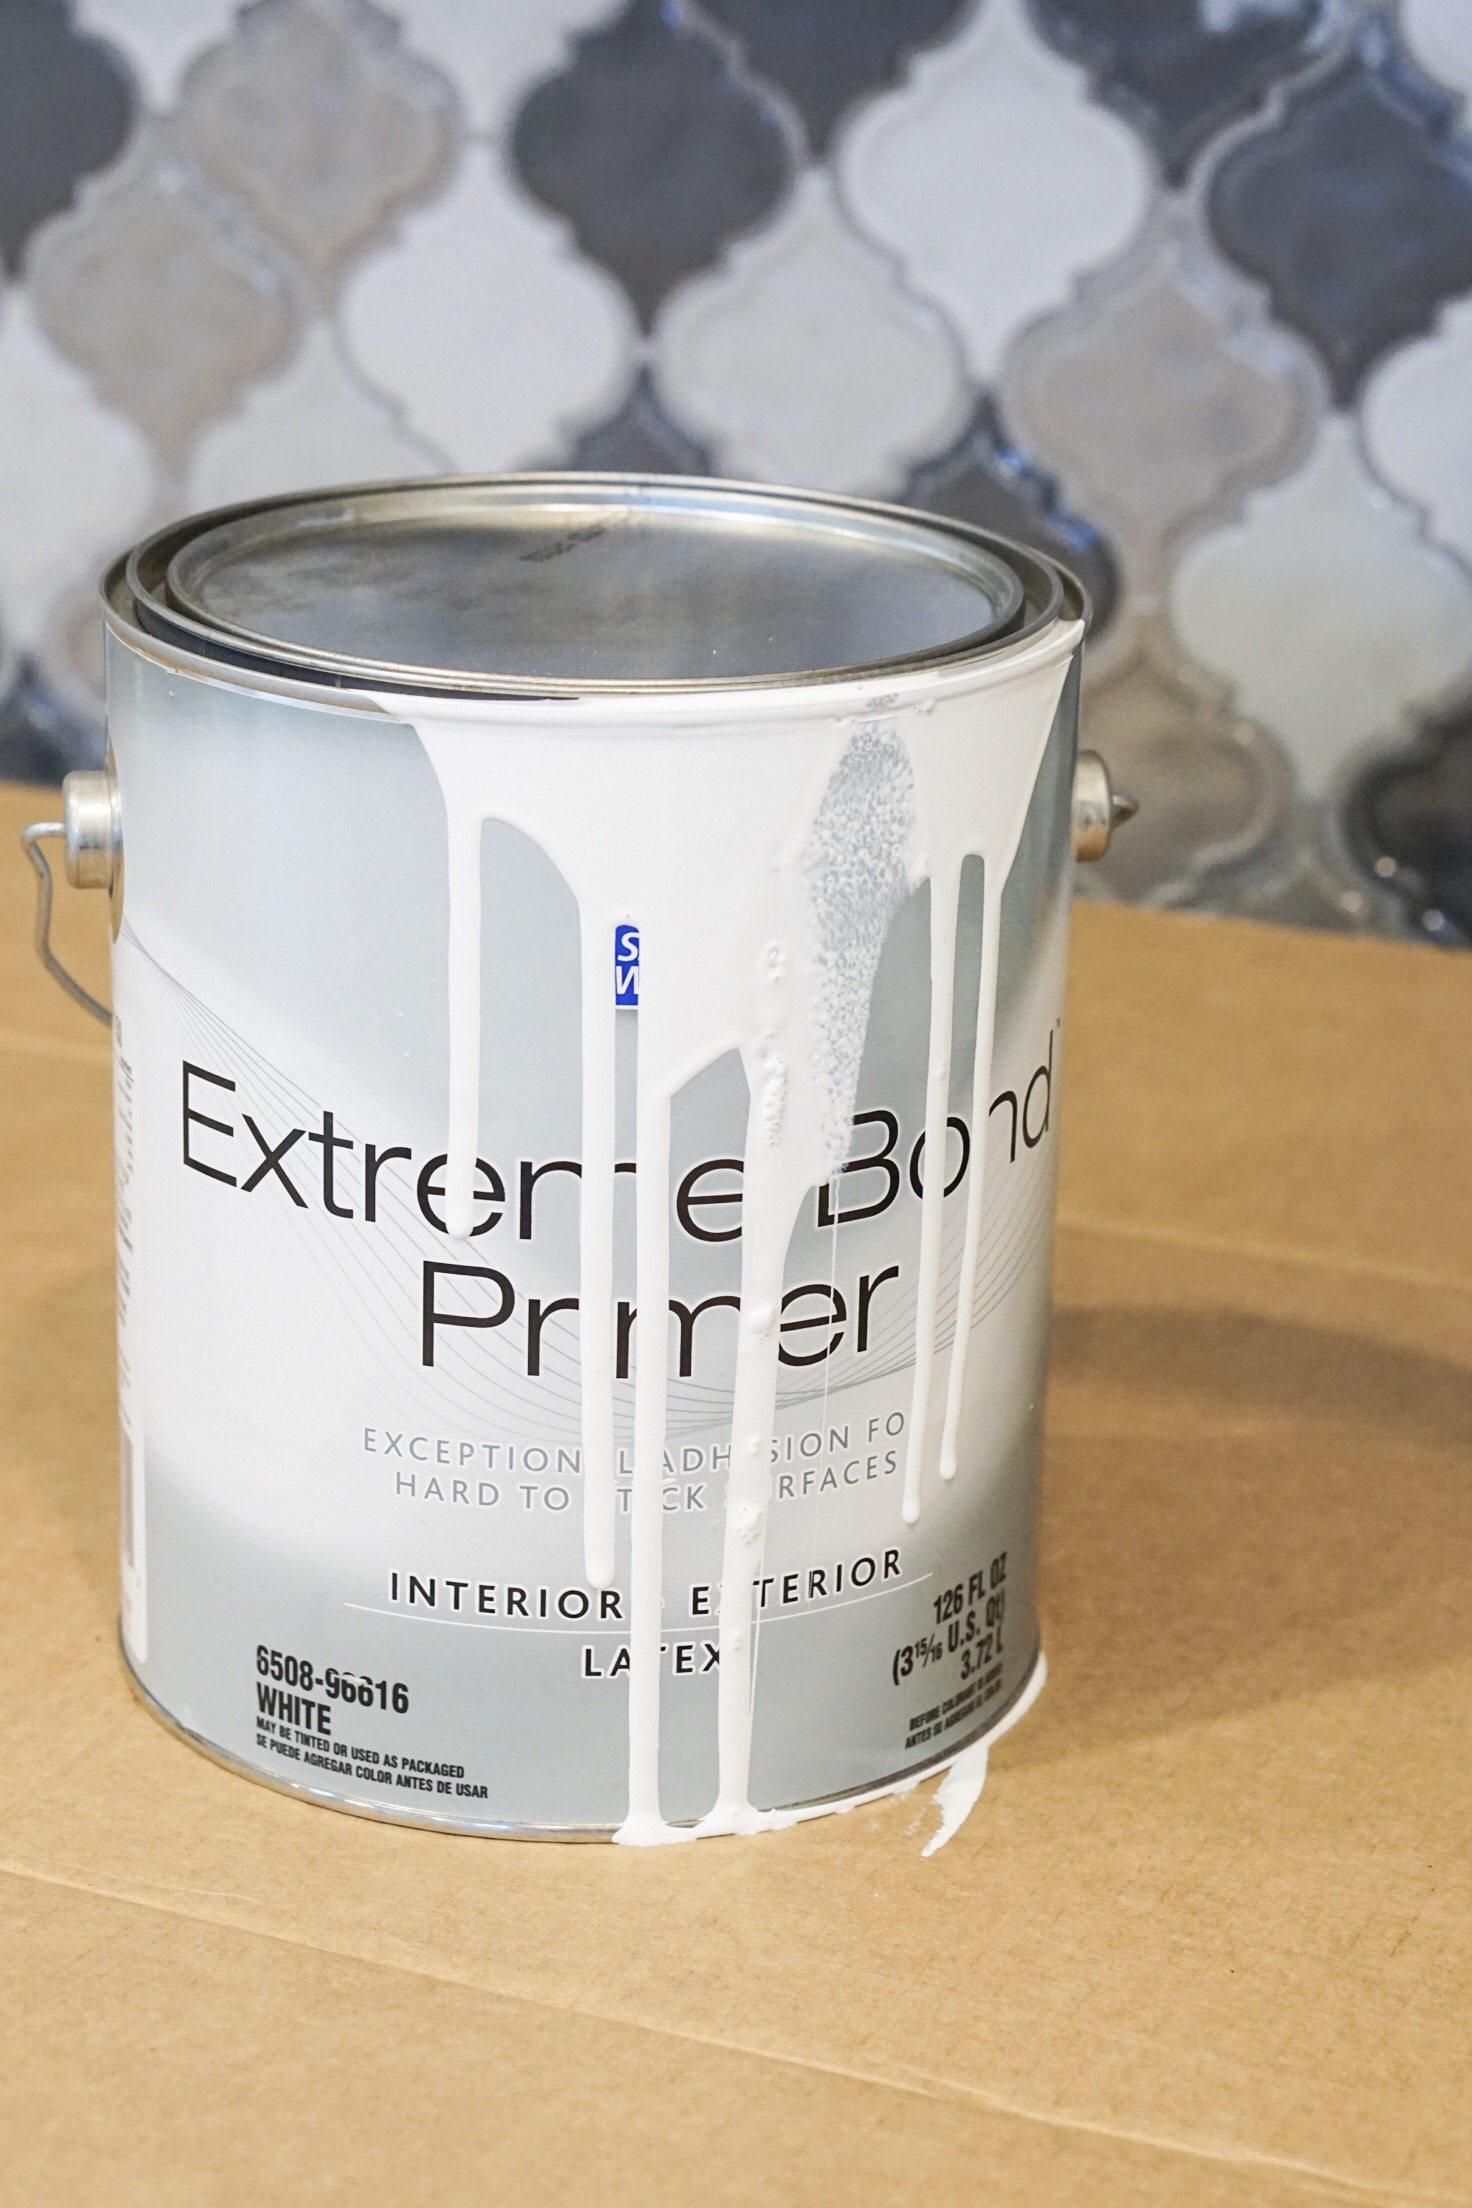
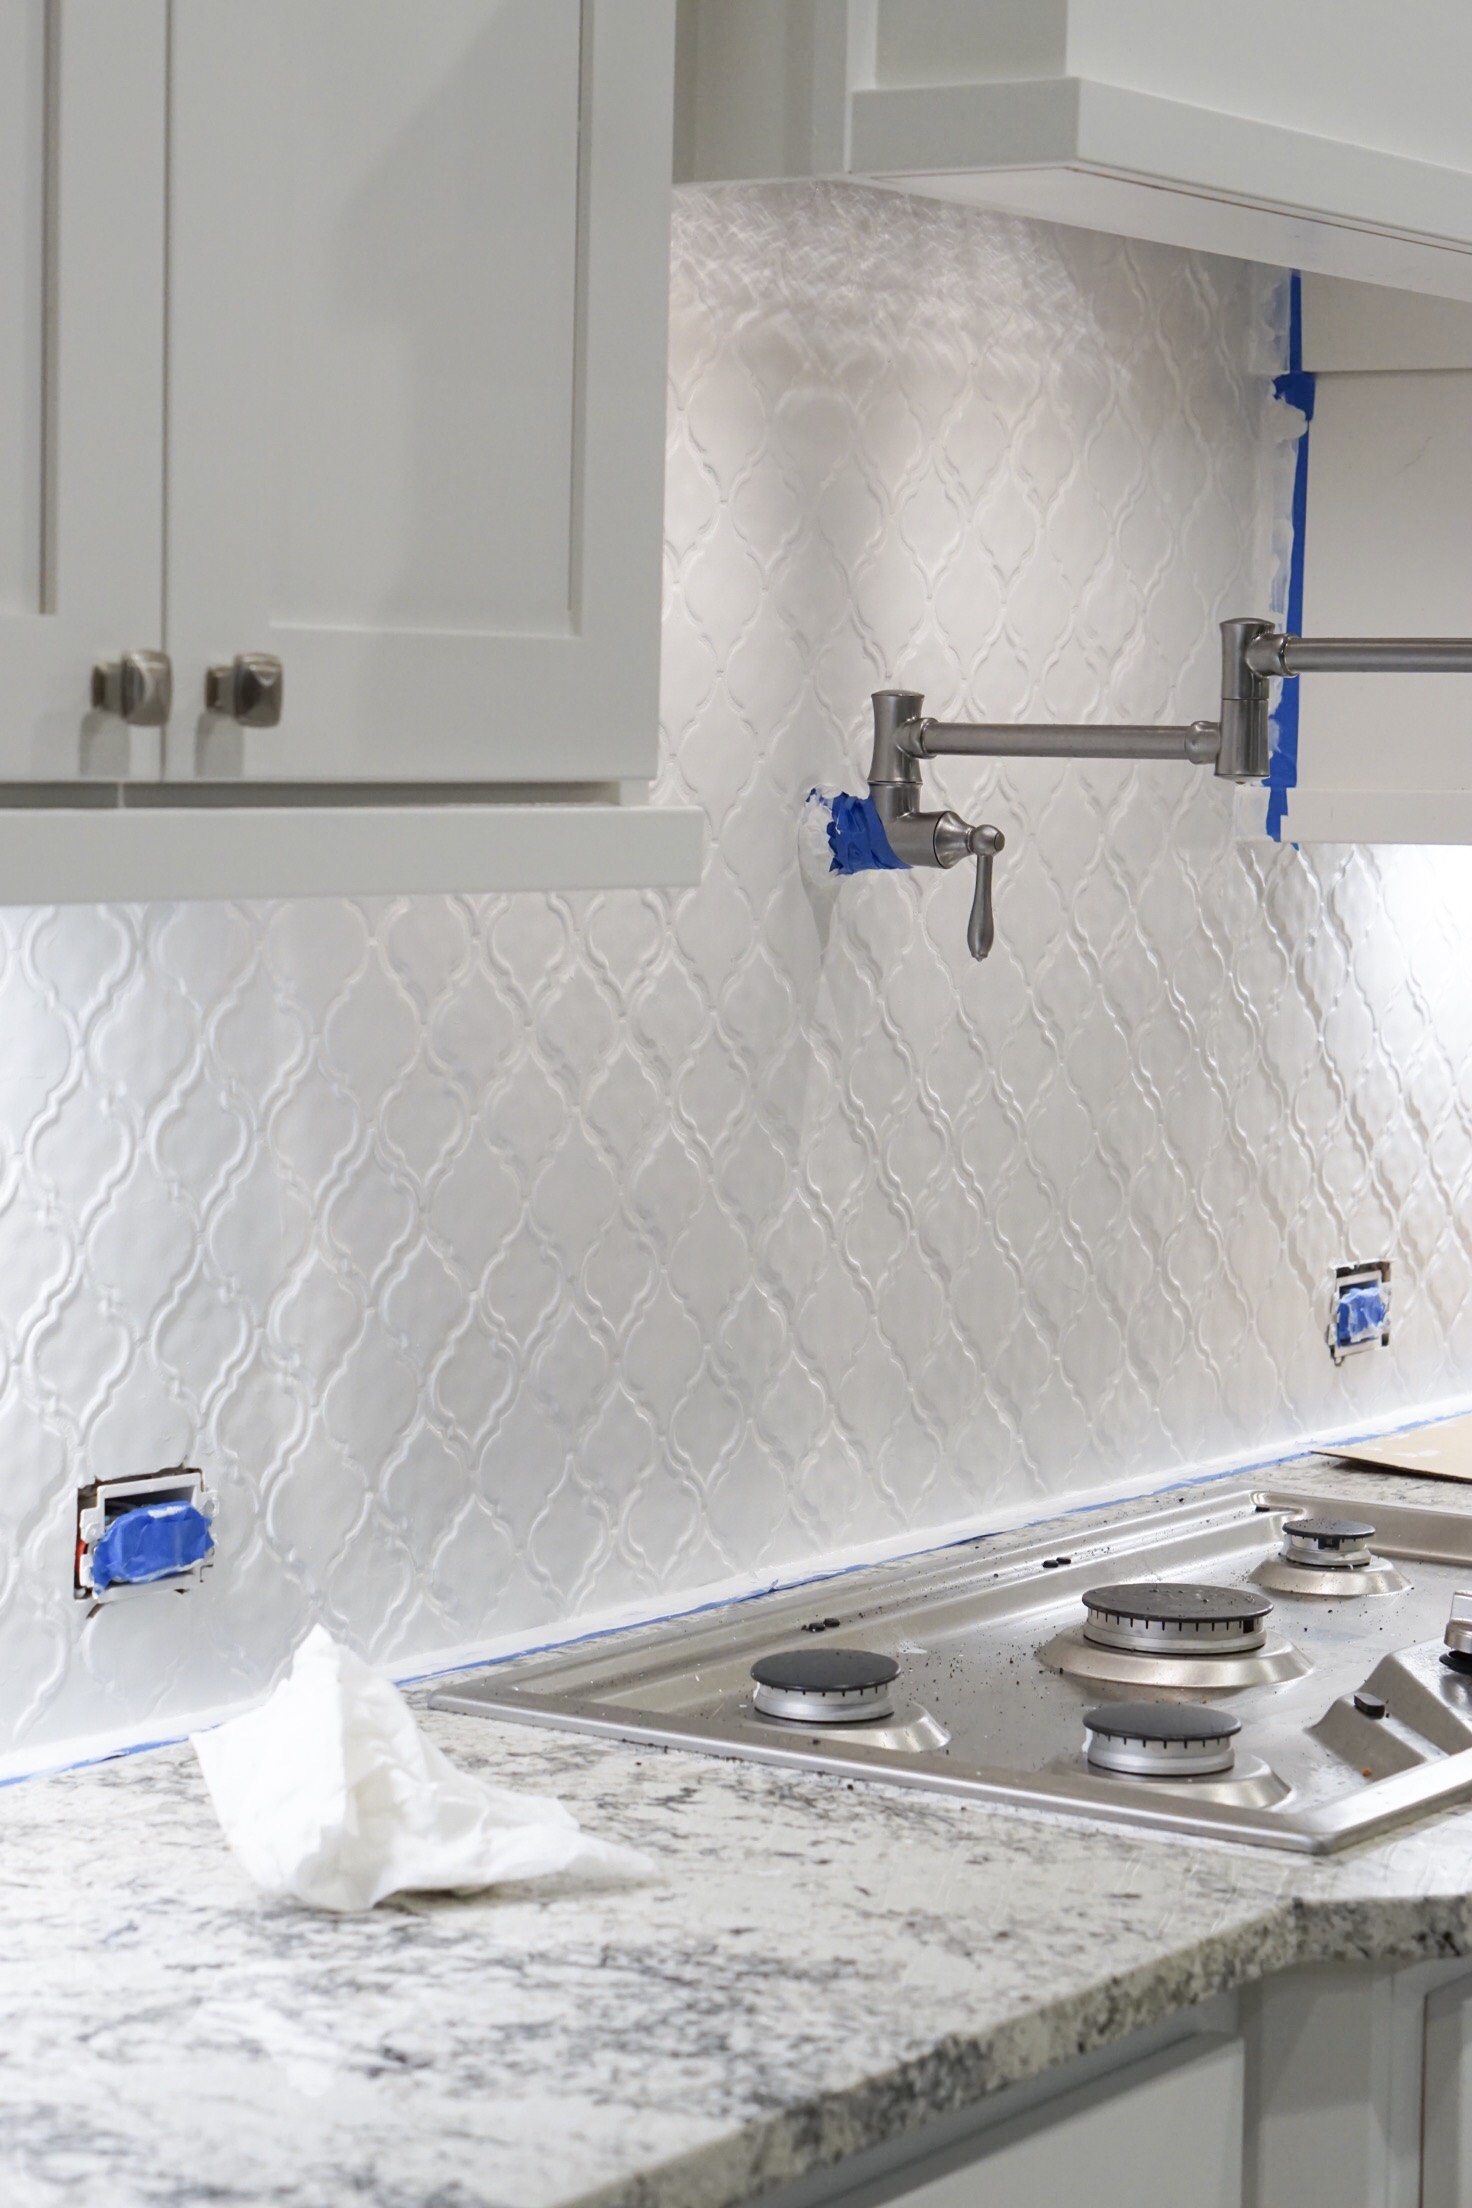
Once it was ready to be primed, we did 3 separate coats of Sherwin Williams Extreme Bond Primer in White, letting each coat completely dry for 3-4 hours before applying the next layer. With that dark tile, it took 3 solid coats to conceal it. If you had lighter tile, it would probably only take 2 coats. We did paint over the grout, which was a medium grey color, so we used 2 separate brushes to paint. A medium-sized roll brush to apply paint evenly/smoothly and a sponge brush to get in the grout and along the top/bottom of area. We bought a gallon of primer but didn’t end up using even half- a little goes a long way with this stuff. We also waited to buy all of our paint and materials until Sherwin Williams was having a 40% off everything sale, which brought the cost of the entire project down to under $100.
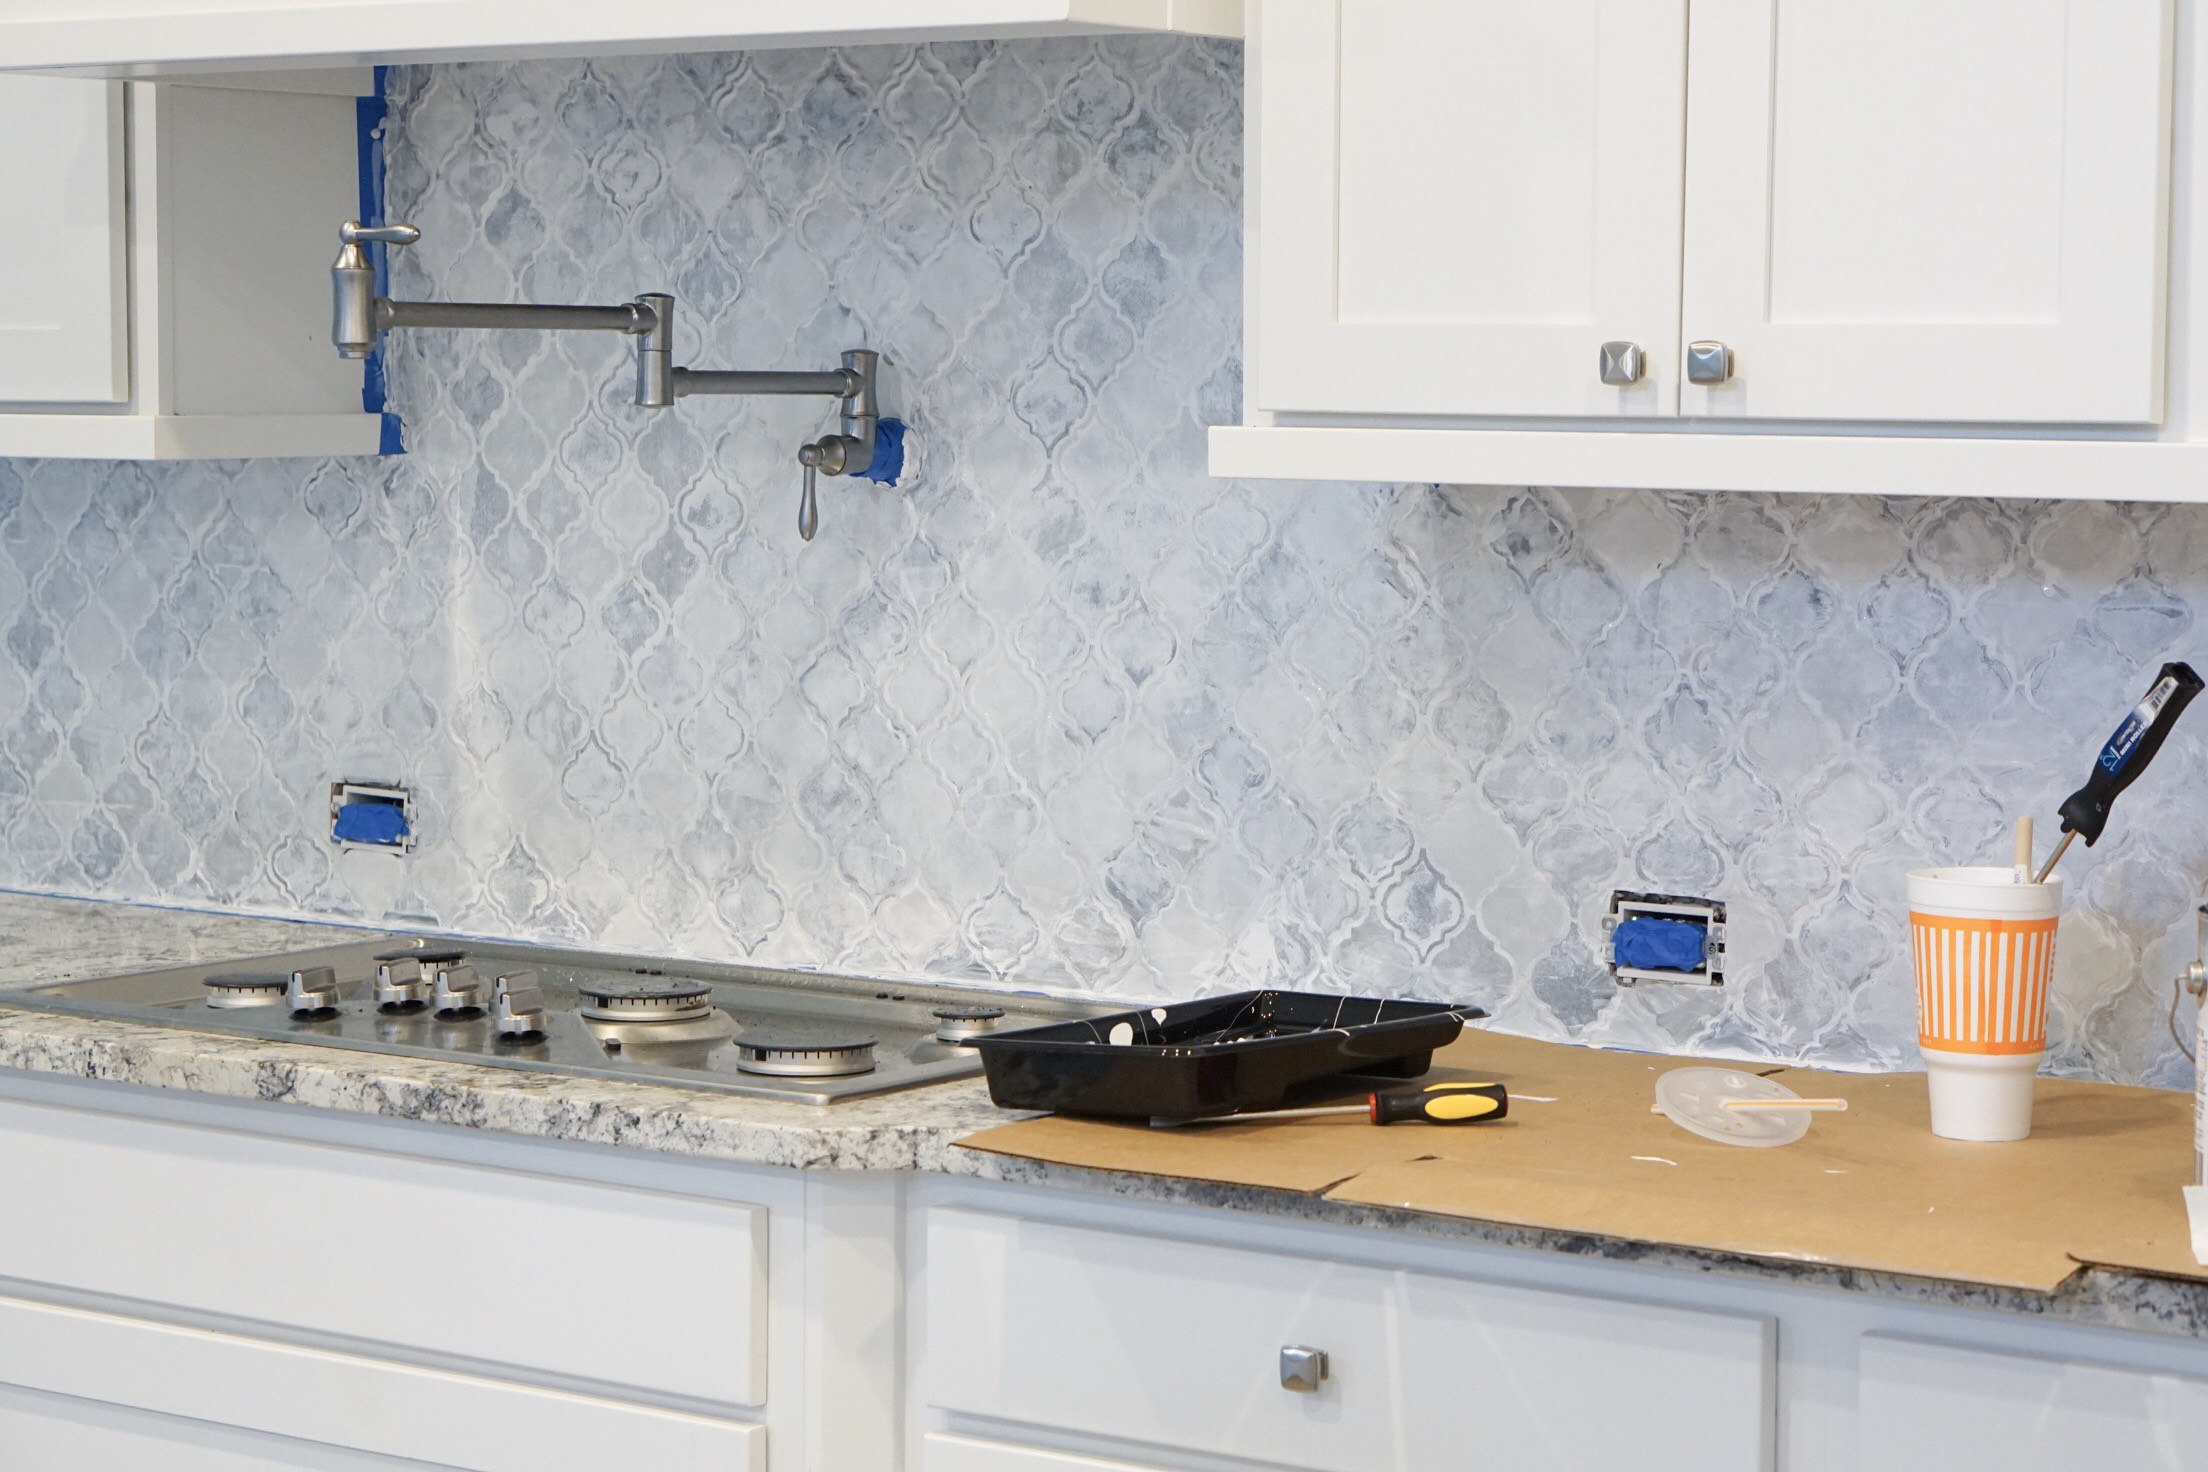

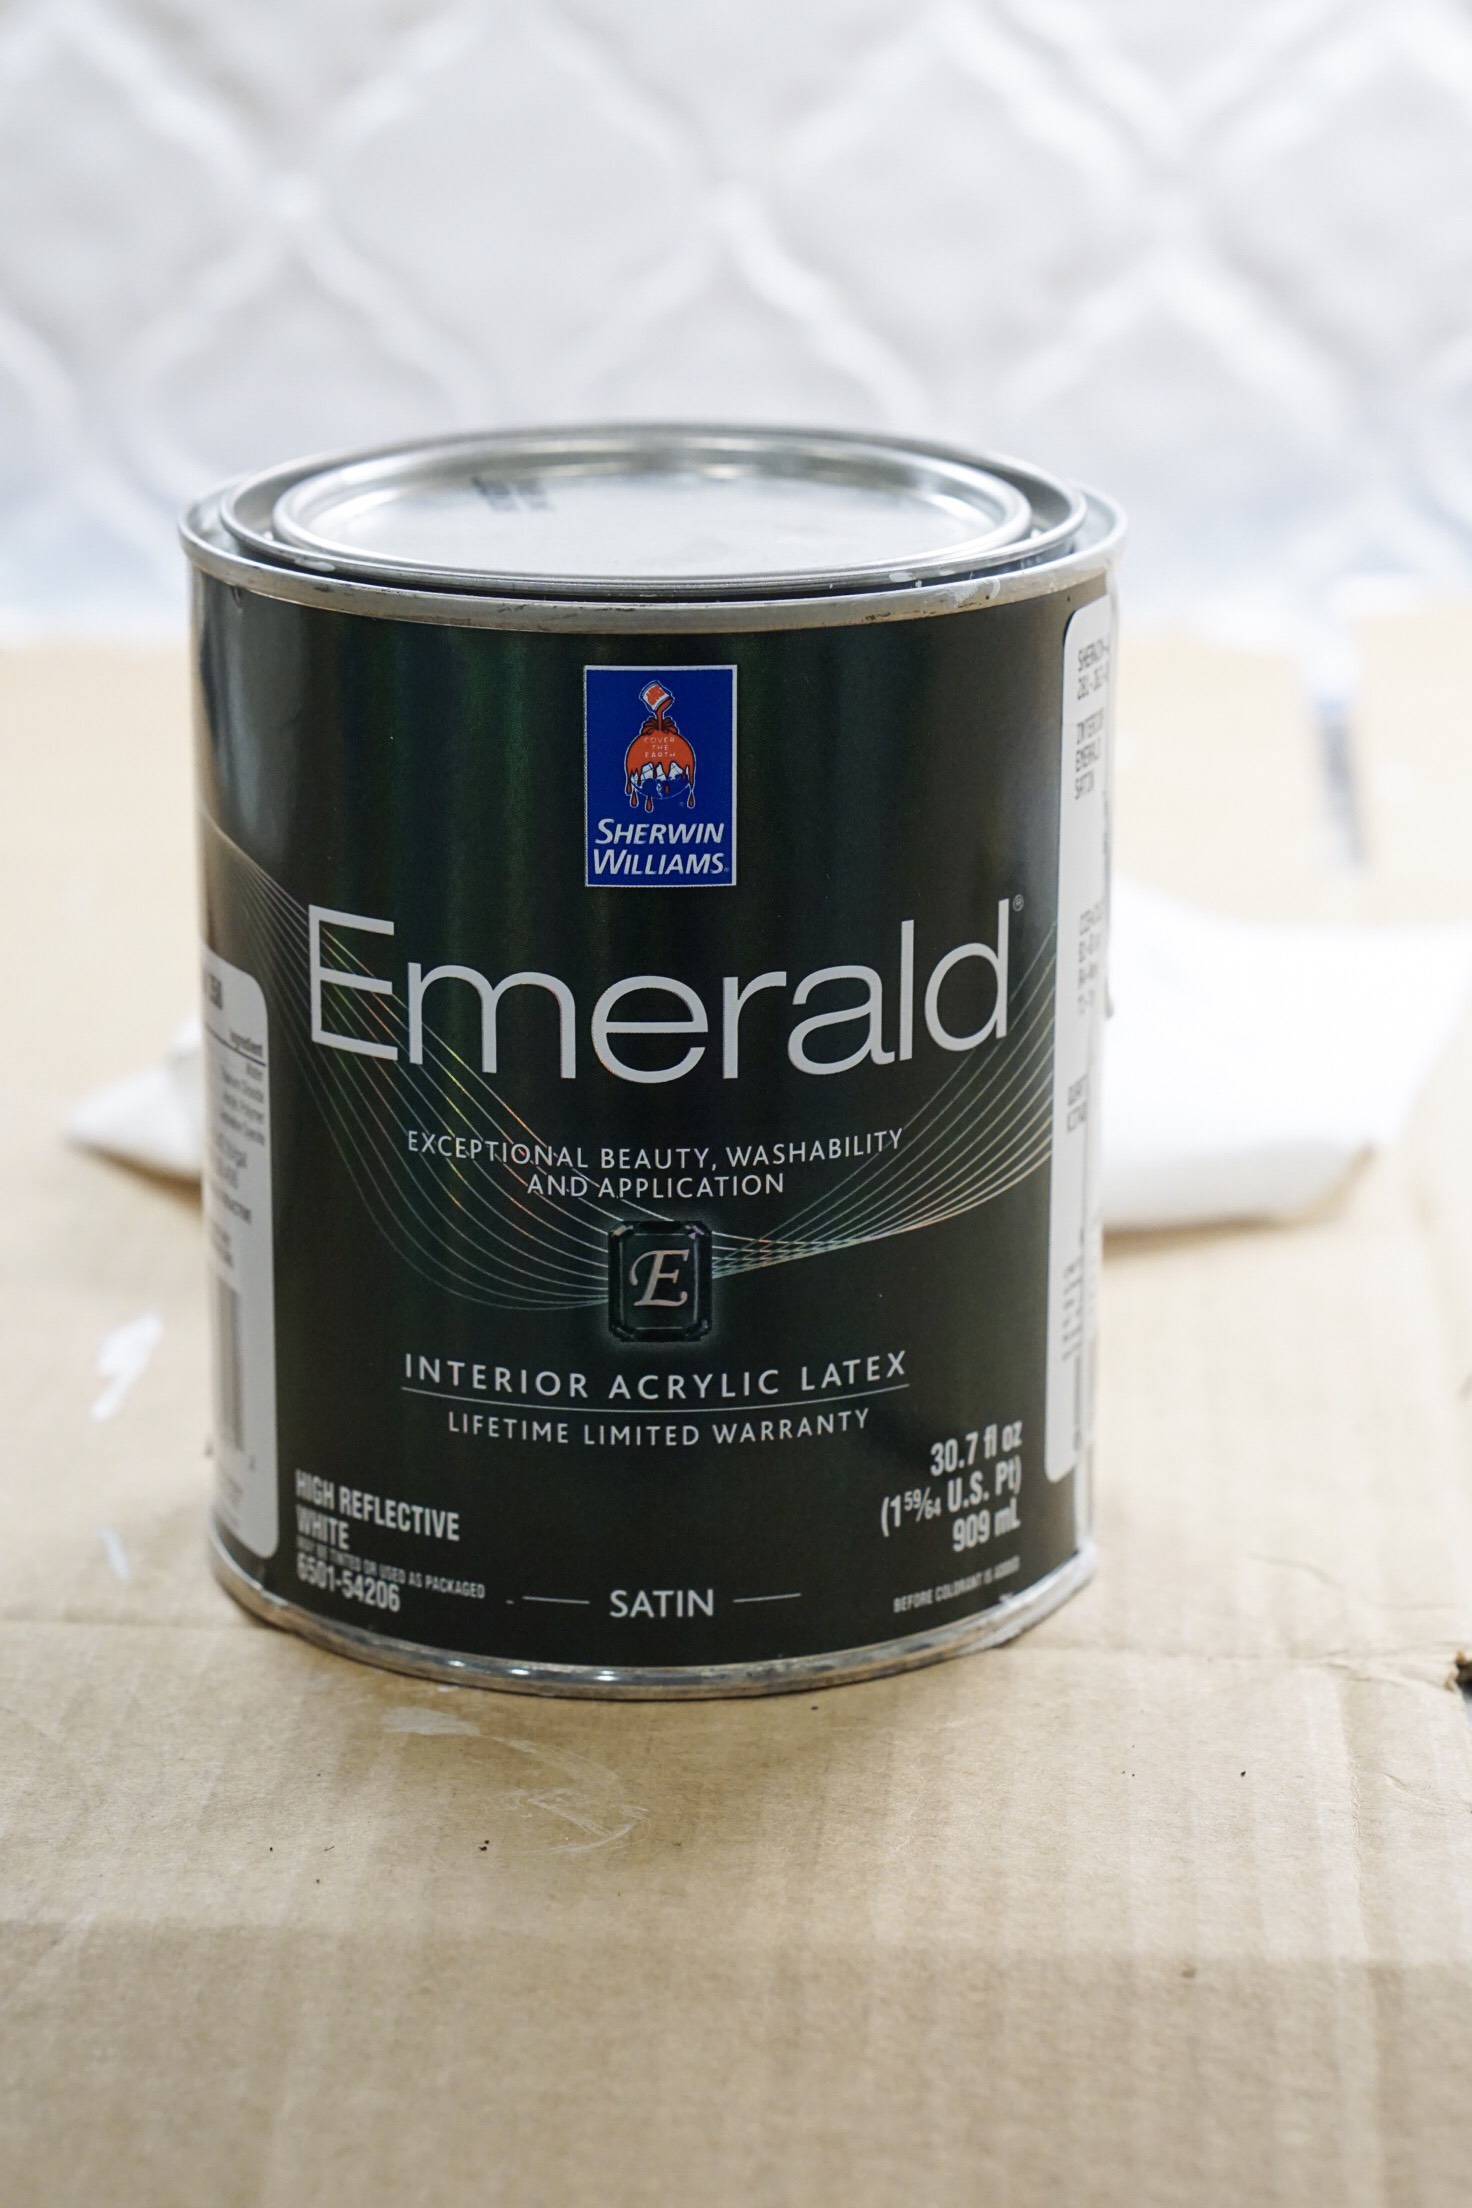
We did all the priming on a Sunday and let the final coat dry completely overnight, waiting until Monday evening to finish the job. You wouldn’t have to wait this long, but this is how our schedule worked out and we were able to finish the job pretty easily on Monday. We used Sherwin Williams Emerald paint in “Rhinestone” as the final color, and are really happy with how it came out! It’s a very light, cool grey, that blends well with our granite and flows with the rest of the kitchen. We debated going with the same white as our cabinets but wanted a slight contrast. Two coats of paint later and we were finished! The Emerald paint adhered very well to the primer; we were impressed with just how easy this part of the job was.
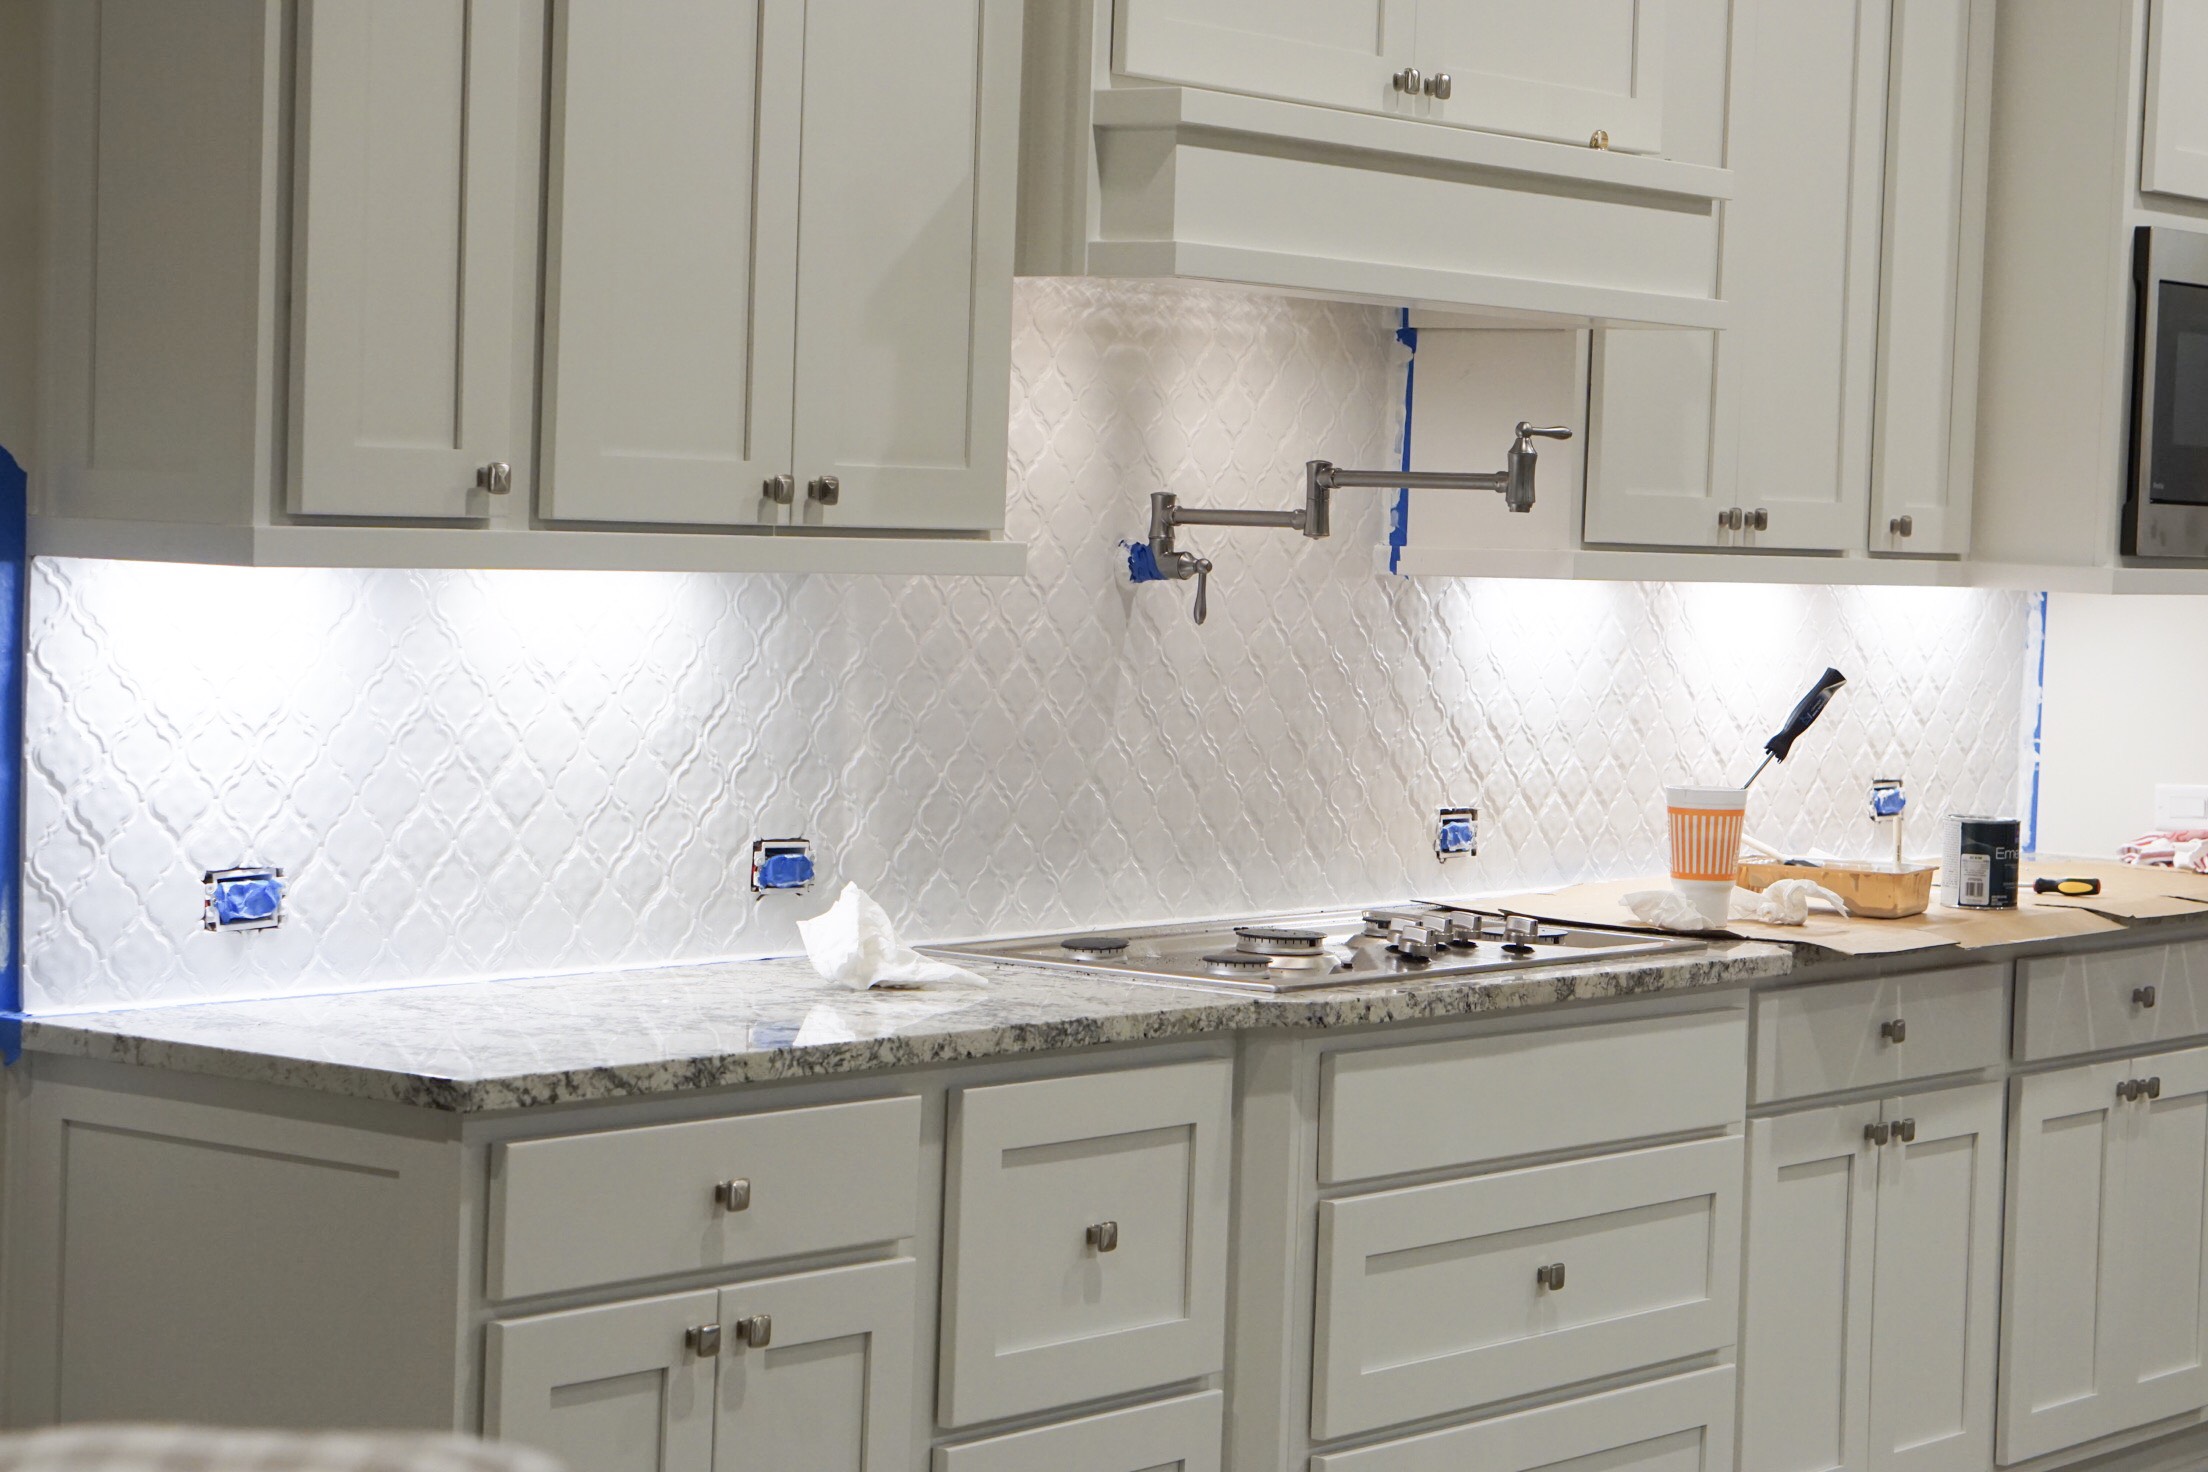
It isn’t perfect, and if you look closely you’ll notice the edge of the grout where the tile meets the granite needs to be touched up. We just bought little paint brushes for this last night and will get it done soon, but for now we are loving our new backsplash!
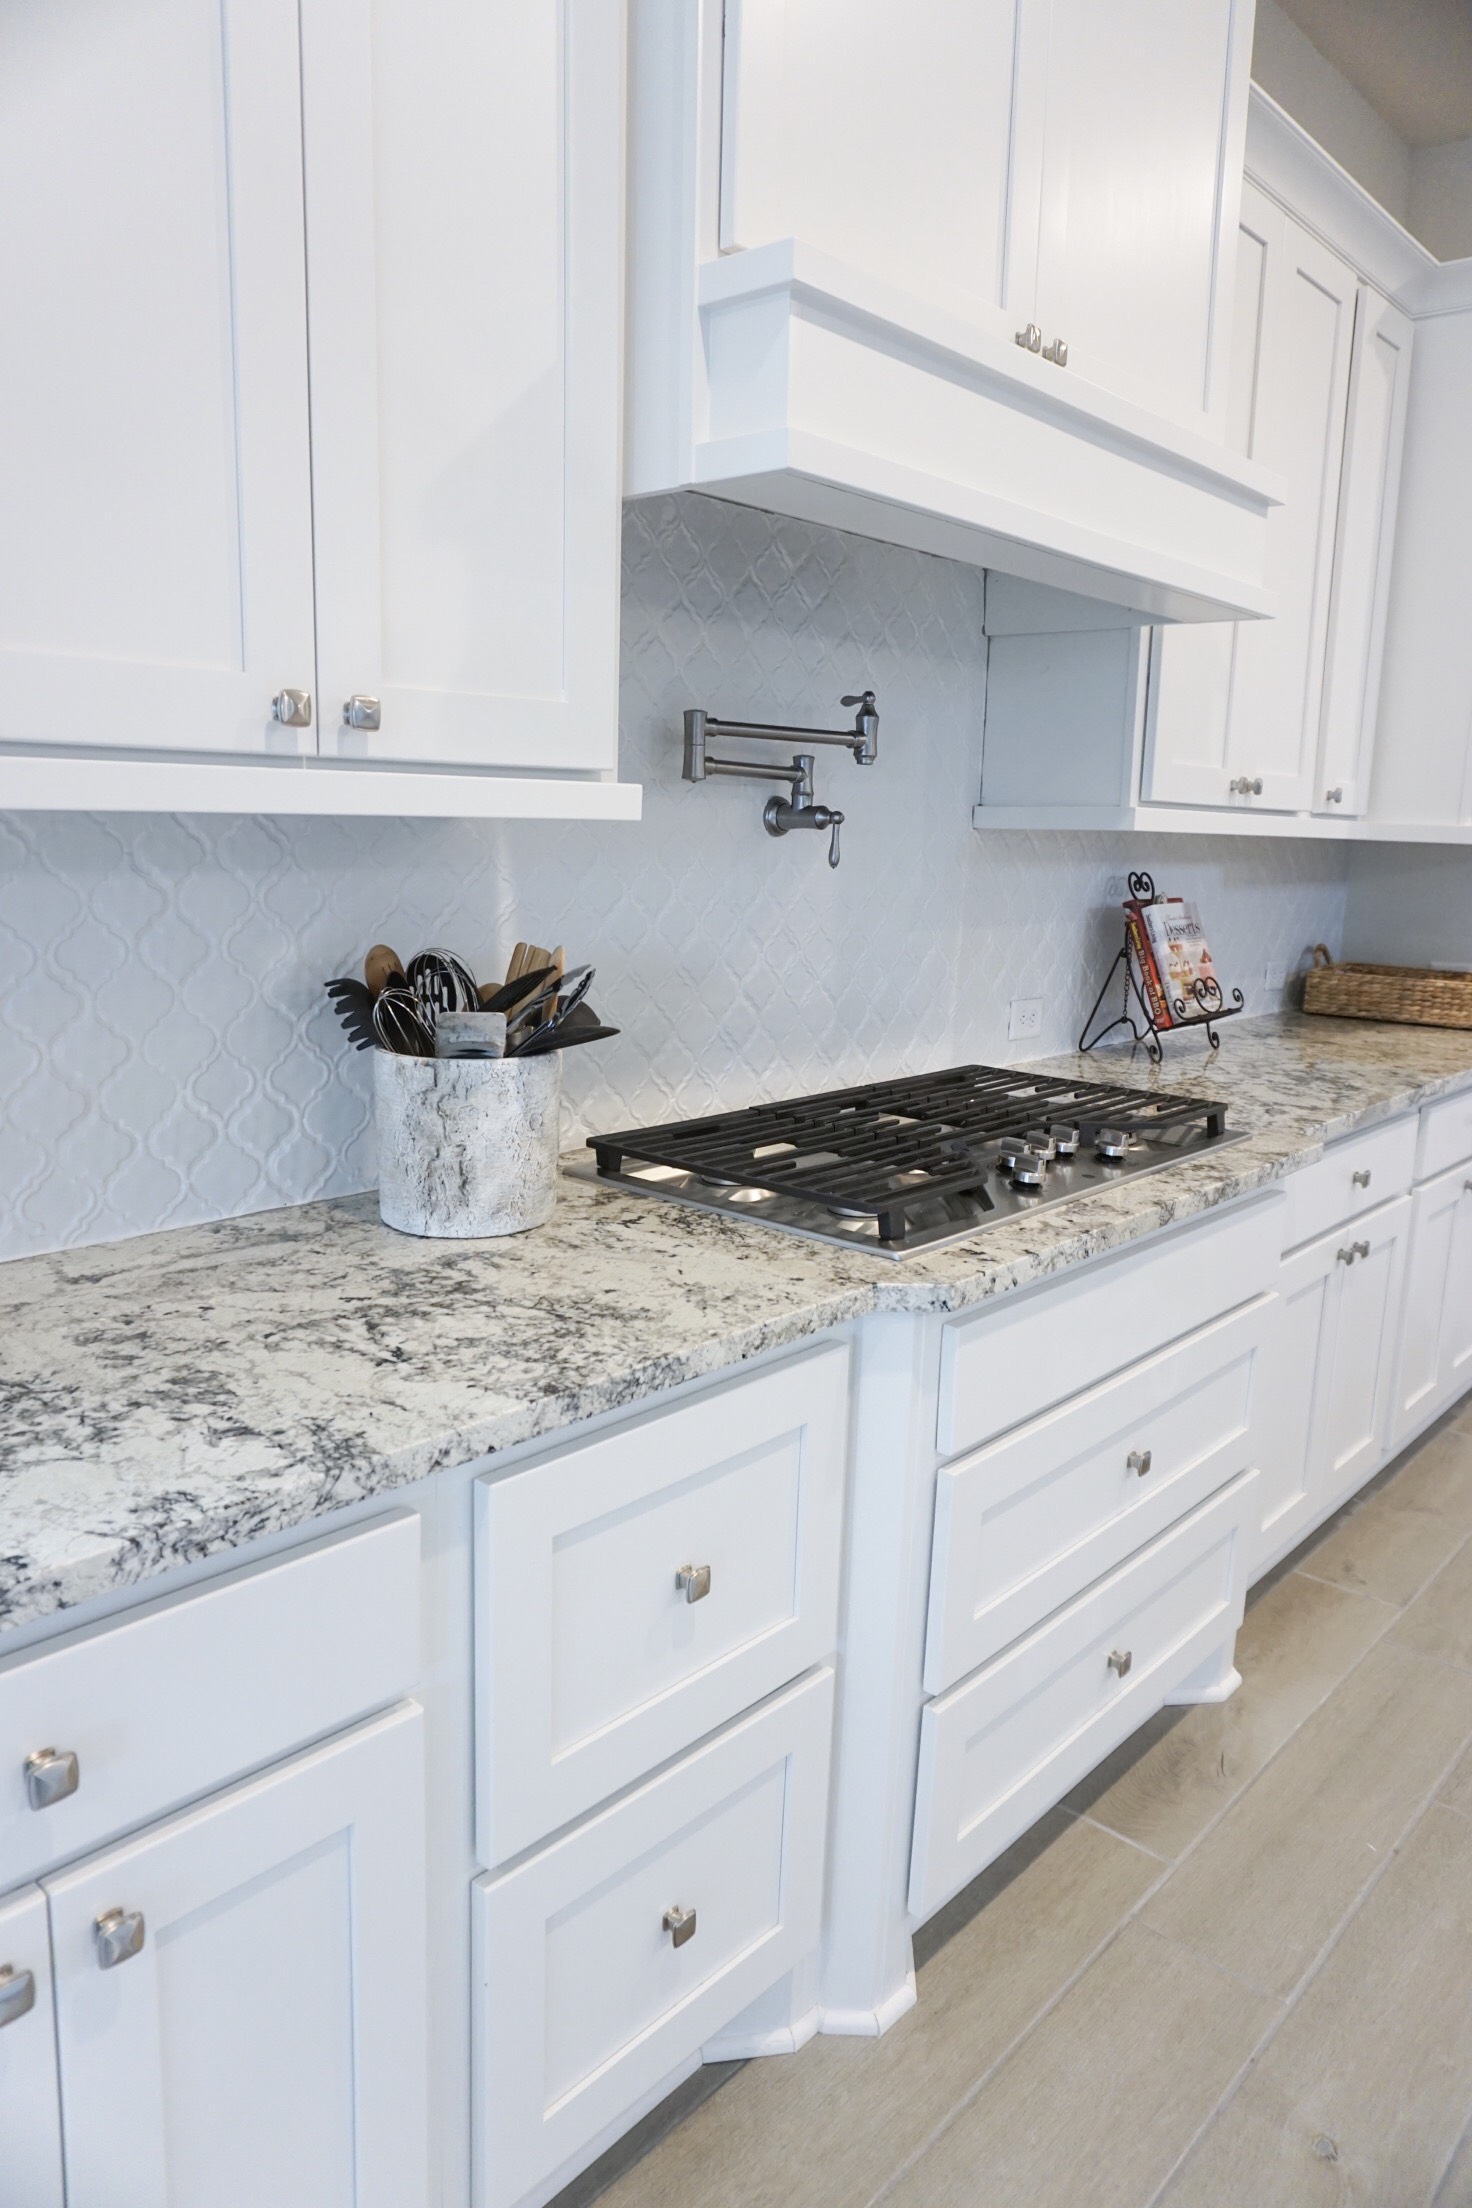
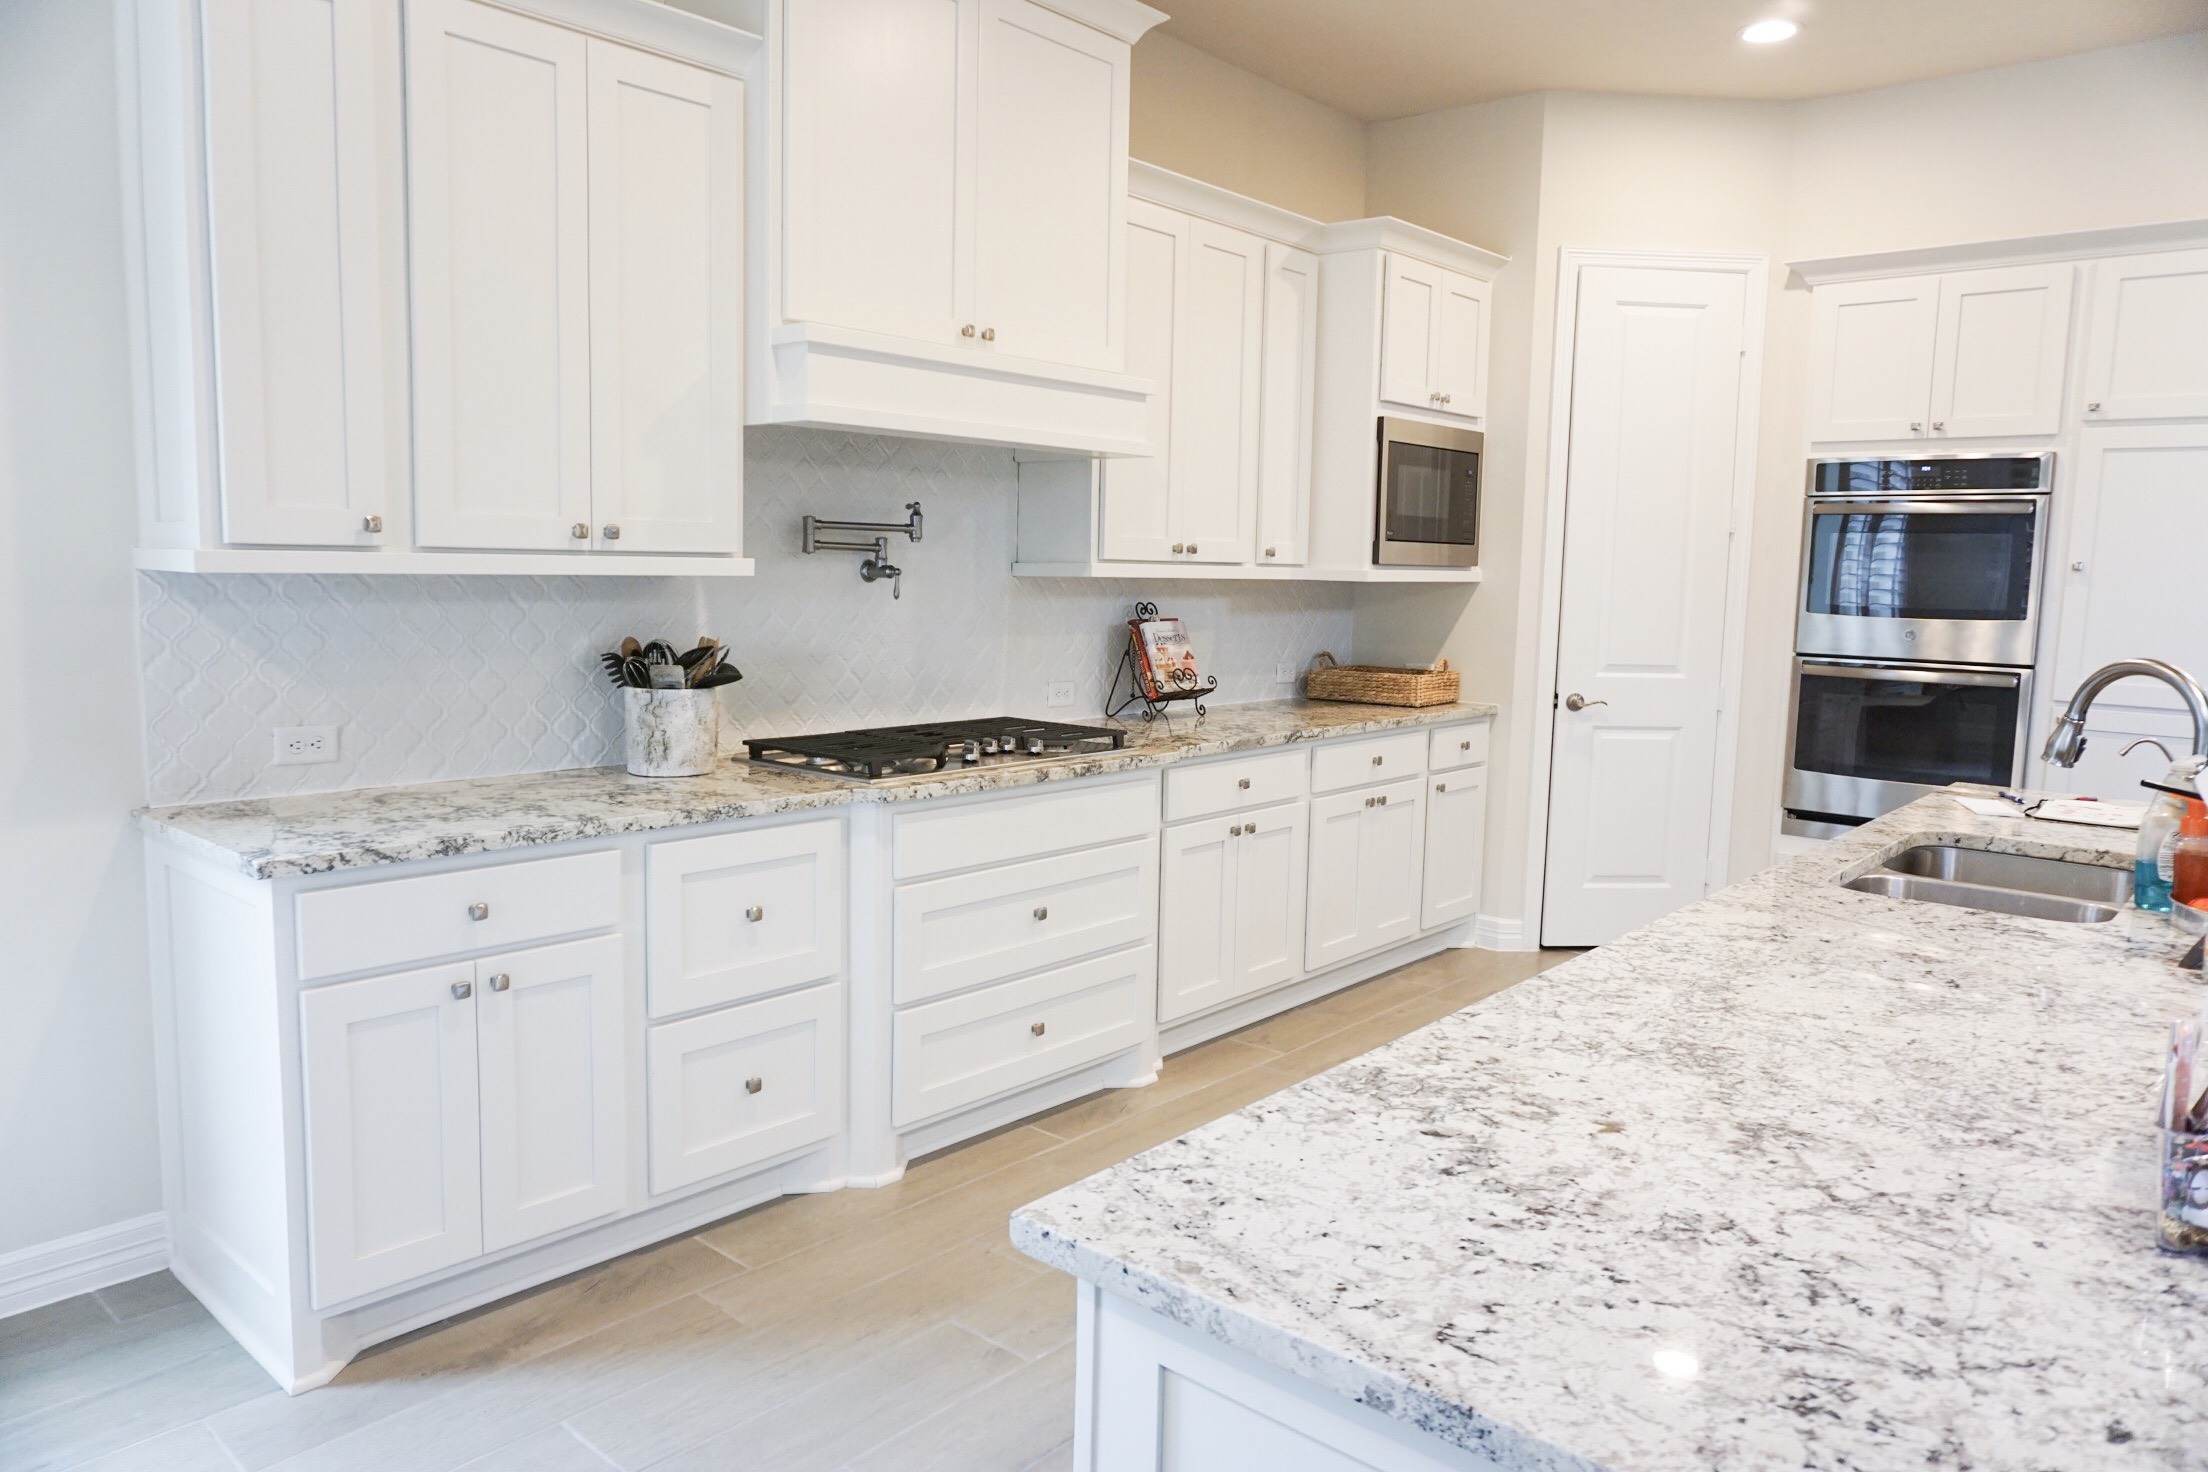
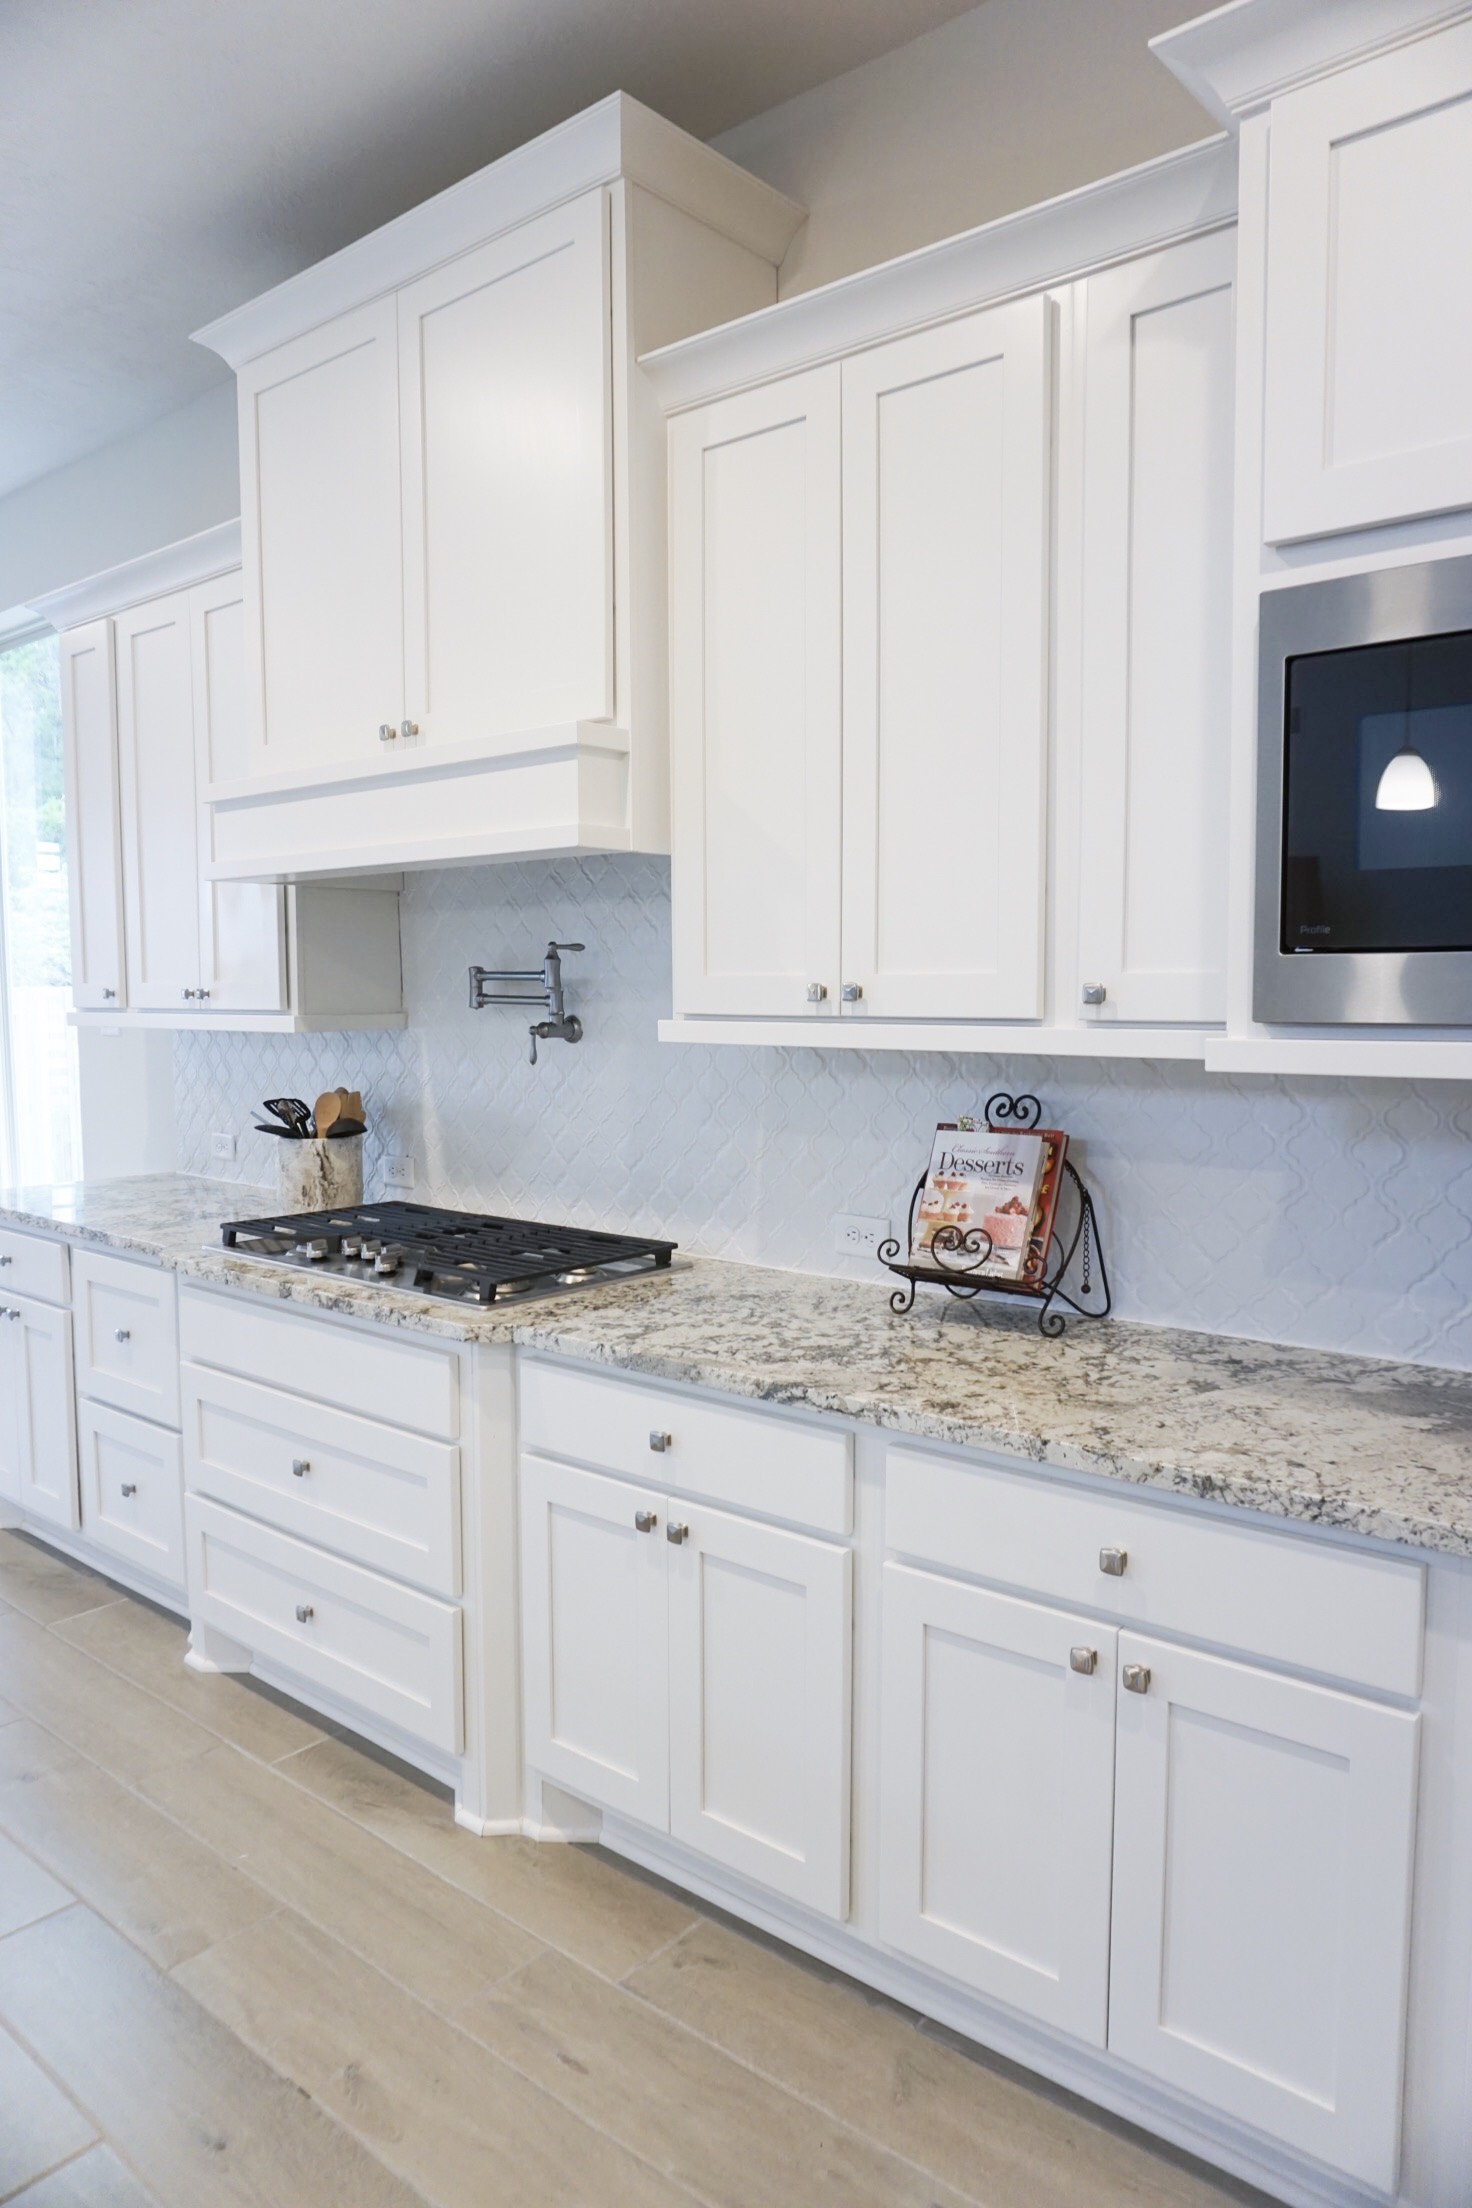
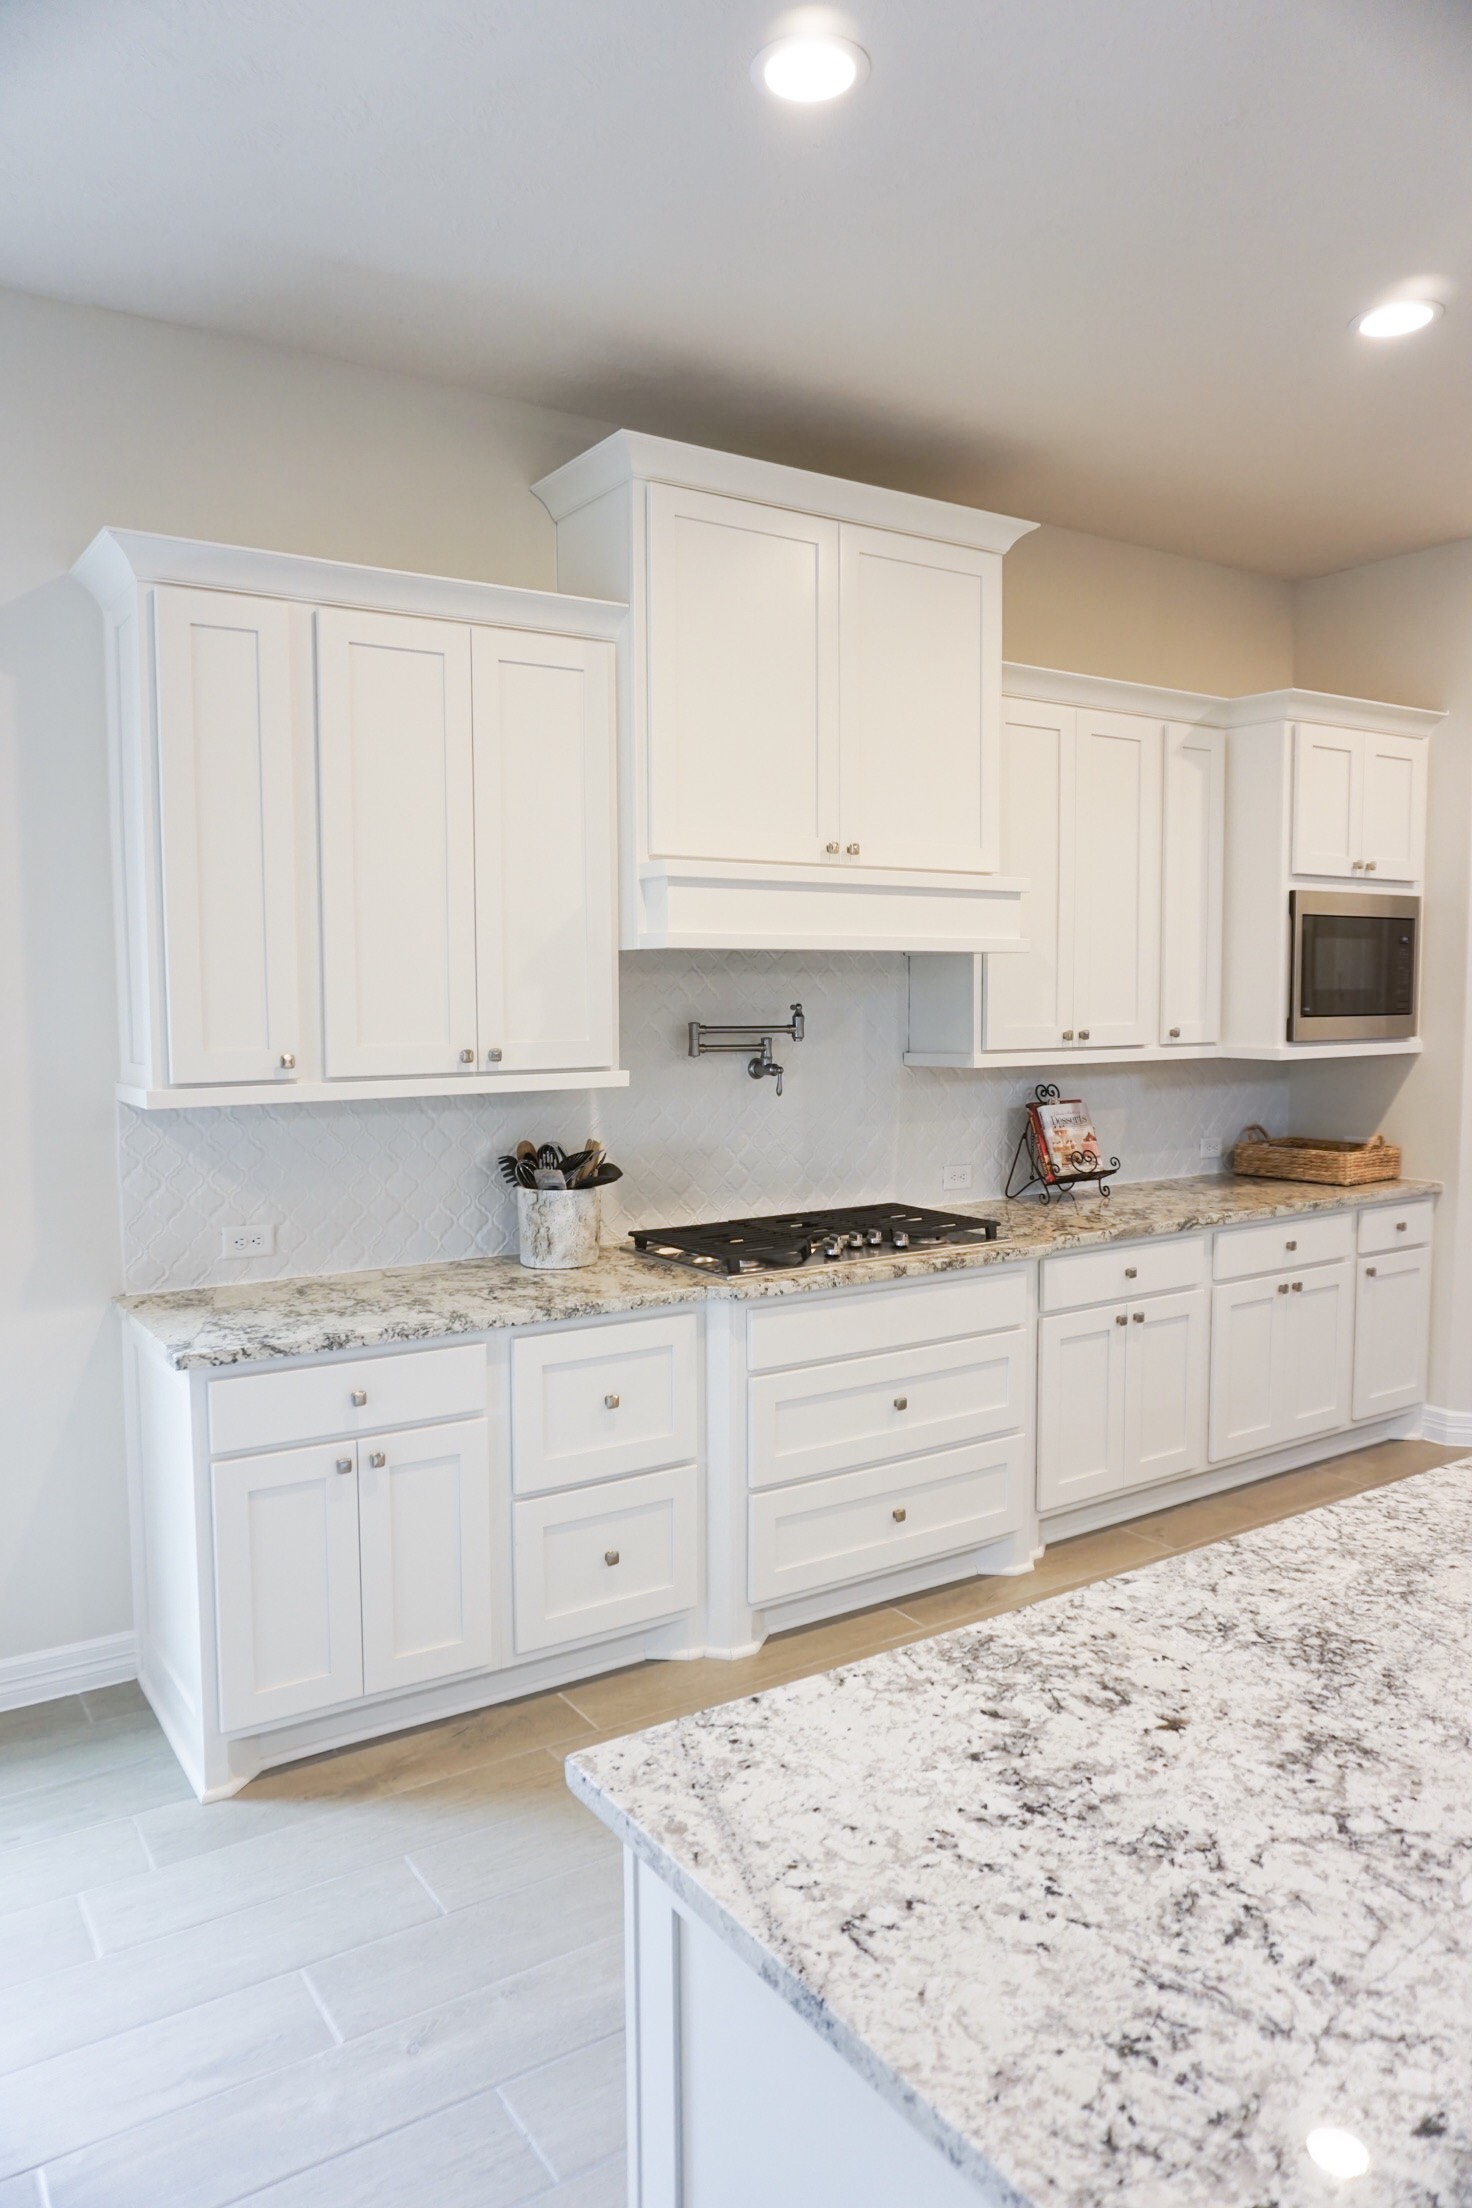
If you’re wanting to given your kitchen a fresh new look and are tired of your backsplash, definitely considering giving it a paint job! Our kitchen feels much brighter, cleaner, and less “busy”- which we love since this is the heart of our home. Not that I cook all that much, but we do make lots of trips to the refrigerator regardless. :)
Hope you all have a great weekend!
xo, Britt